

WaxFrame puts a team of AI assistants to work on your document at the same time. One AI writes and refines — the rest review, challenge, and suggest improvements. Round by round, your document gets sharper. This manual covers every screen, every button, and every field in the exact order you encounter them. Appendices and reference sections follow at the end for advanced features and troubleshooting.
WaxFrame runs multiple AI assistants on your document at the same time. Most of them act as reviewers — they each read your document independently and produce numbered, specific suggestions for improvement. One AI acts as the Builder — it reads every suggestion from every reviewer, decides which ones are the strongest, and rewrites the document incorporating them. You review the result, resolve any disagreements between AIs, and run another round if needed. Each round the document improves — you stop when you're satisfied with the result.
WaxFrame works whether you are starting from a blank page, improving an existing draft, uploading a file, or pasting content in. It handles any kind of written document — business proposals, technical reports, cover letters, blog posts, marketing copy, executive summaries, policy documents, résumés, and more.
WaxFrame walks you through four setup screens in order before you reach the Work screen. Each screen is dedicated to one task, and you can move forward or back freely using the navigation buttons at the top of each screen.
| Screen | What you do there |
|---|---|
| Setup 1 — Set up your hive | Connect your AI assistants by saving their API keys, pick each AI's model, and crown one of them Builder (the AI that rewrites your document each round). One-time setup — your configuration is saved automatically and is there every time you return. |
| Setup 2 — Your Project | Name your project and fill in the structured goal fields that guide every AI. |
| Setup 3 — Reference Material | Optional. Paste or upload source material The Hive will reference on every round but never edit — job descriptions (rules and responsibilities), RFP requirements, style guides, scoring rubrics, prior decisions, vendor claims. |
| Setup 4 — Starting Document | Upload a file, paste text, or choose to start from scratch and let the AIs write the first draft. |
| Work | Run rounds, read the updated document, resolve conflicts between AIs, refine further if needed, and export when you are done. |
WaxFrame connects to AI providers using API keys. An API key is a unique code — like a password — that gives WaxFrame permission to use a specific AI on your behalf. You need at least two API keys from any combination of the supported providers: ChatGPT (OpenAI), Claude (Anthropic), Gemini (Google), Grok (xAI), Perplexity, or Mistral.
You pay each AI provider directly for the tokens you use. WaxFrame itself does not charge per use — it requires only a one-time license fee after your first three free rounds.

If you are not sure how to get API keys or which providers to use, open the API Key Guide — it has step-by-step instructions and direct links to each provider's signup and key console pages.
Stuck on anything, or hit a bug? Visit the 🛟 Help page — it has a one-click diagnostic bundle exporter (your keys and document text are stripped automatically) and a pre-filled GitHub issue link. You can also reach it any time from the ☰ menu in the top-left under Help & Support.
Every new installation of WaxFrame includes three free rounds. A round is one complete cycle — all your reviewer AIs process the document and the Builder produces an updated version. Three rounds is enough to see meaningful improvement on most documents. The free round count is stored in your browser and persists across sessions — it does not reset when you start a new project.
After your three free rounds, WaxFrame requires a license key to run additional rounds. Purchase one at weirdave.gumroad.com/l/WaxFrame(opens in a new tab). Your key arrives by email immediately after purchase. The license is a one-time purchase with no subscription or renewal fee.
| File / Folder | What it is |
|---|---|
index.html | The main application. Double-click this to open WaxFrame in your browser. This is the only file you interact with directly. |
style.css | Visual styling for the application. Do not edit. |
js/ | All application logic, split across modules: app.js (main app), storage.js (state persistence + checkpoints), api.js (provider HTTP), provider-models.js (model lists), theme.js (light/dark), version.js (build stamp), plus several smaller helpers. Do not edit. |
api-details.html | The API Key Guide — a separate page with step-by-step instructions for getting an API key from each supported provider, including direct links to each provider's signup page and key console. |
waxframe-user-manual.html | This document. |
document-playbooks.html | A library of ready-made project goals for common document types — résumés, business proposals, blog posts, RFPs, cover letters, and more. Open this when you are not sure what to write for your project goal. |
what-are-tokens.html | A plain-English explanation of AI tokens, how they are counted, what they cost, and how to manage your spending across providers. |
prompt-editor.html | An advanced tool for customising the exact instructions WaxFrame sends to your AIs each round. For experienced users only. |
images/ | All icons and images used by the application. |
sounds/ | Sound effects played during rounds and at completion. |
docs/ | PDF versions of this manual and the Getting Started guide for printing or offline reference. |
WaxFrame is a browser-based application. There is nothing to install — you open index.html in any modern web browser and the app runs entirely in that browser window. Your API keys, settings, and session data are saved in your browser's local storage, not in the folder. This means the files in the folder never change as you use the app.
⚠️ Because your data lives in your browser, clearing your browser's site data or cache will permanently erase your saved API keys, settings, and any unsaved session. Use Menu → 💾 Checkpoint - Save regularly to save a copy of your session that you can restore later.
Once you have index.html open, bookmark it in your browser using Ctrl+D on Windows or Cmd+D on Mac so you can open it quickly in future. On Windows you can also right-click the file in File Explorer and choose Send to → Desktop (create shortcut). On Mac, drag the file to your Dock to pin it.

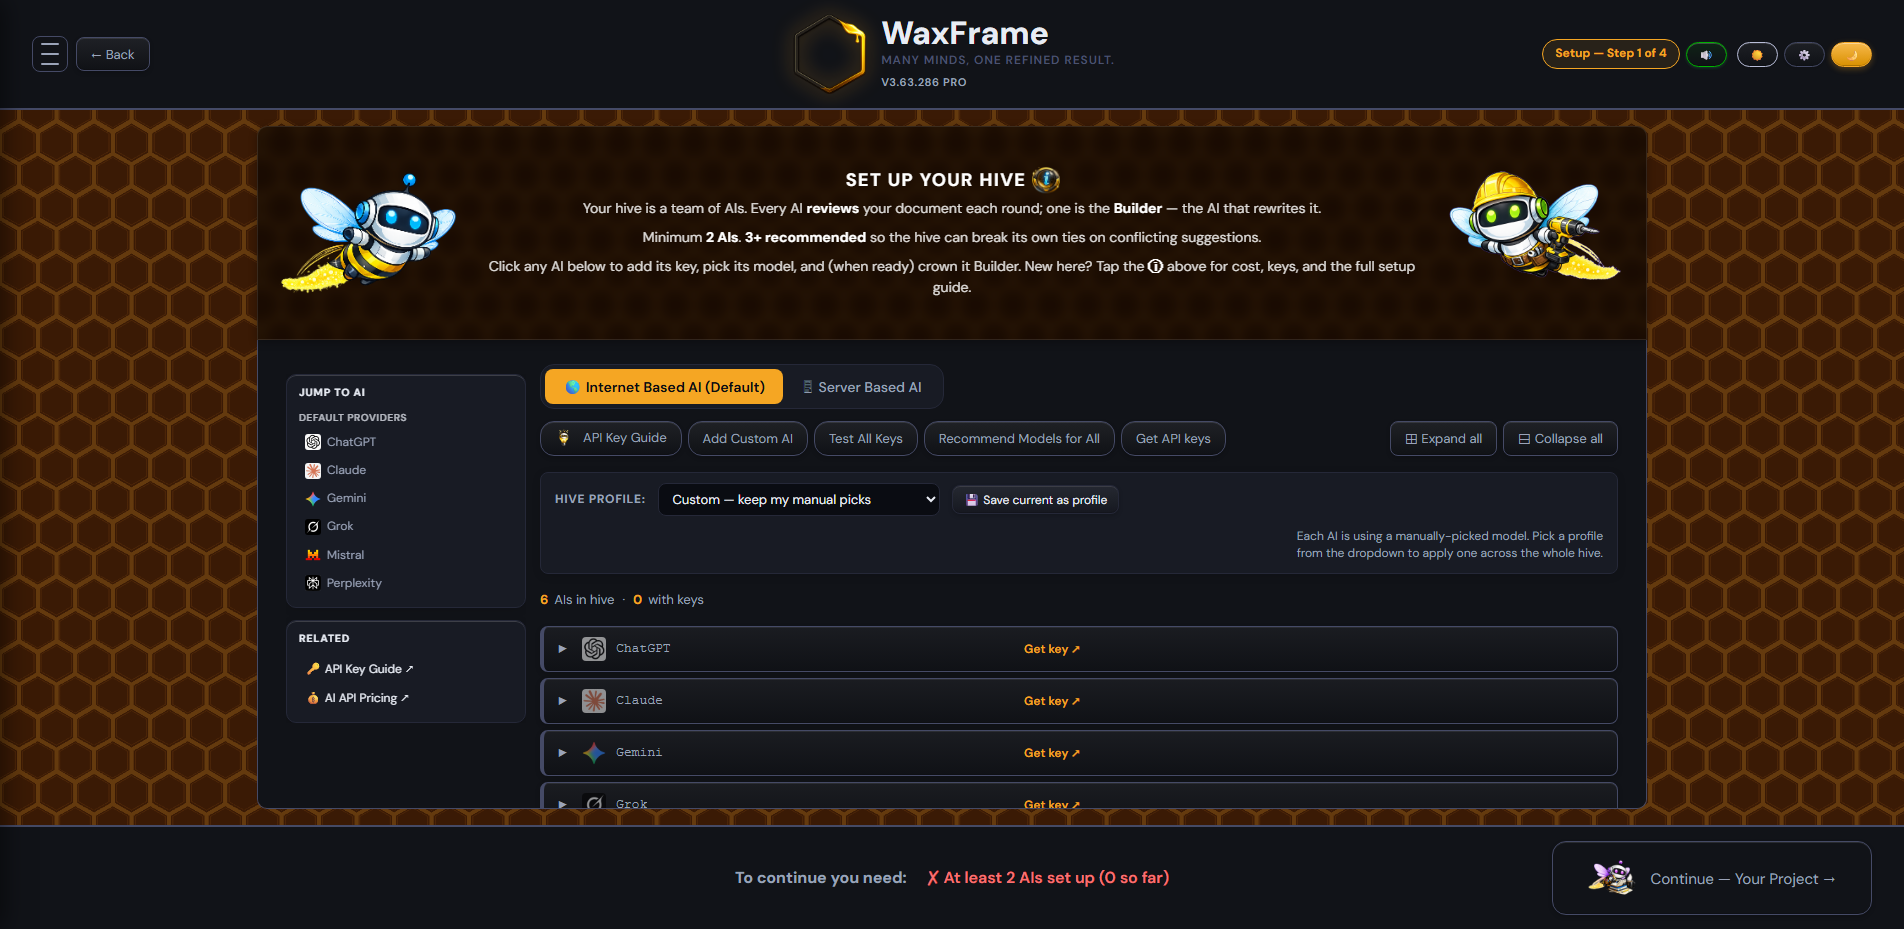
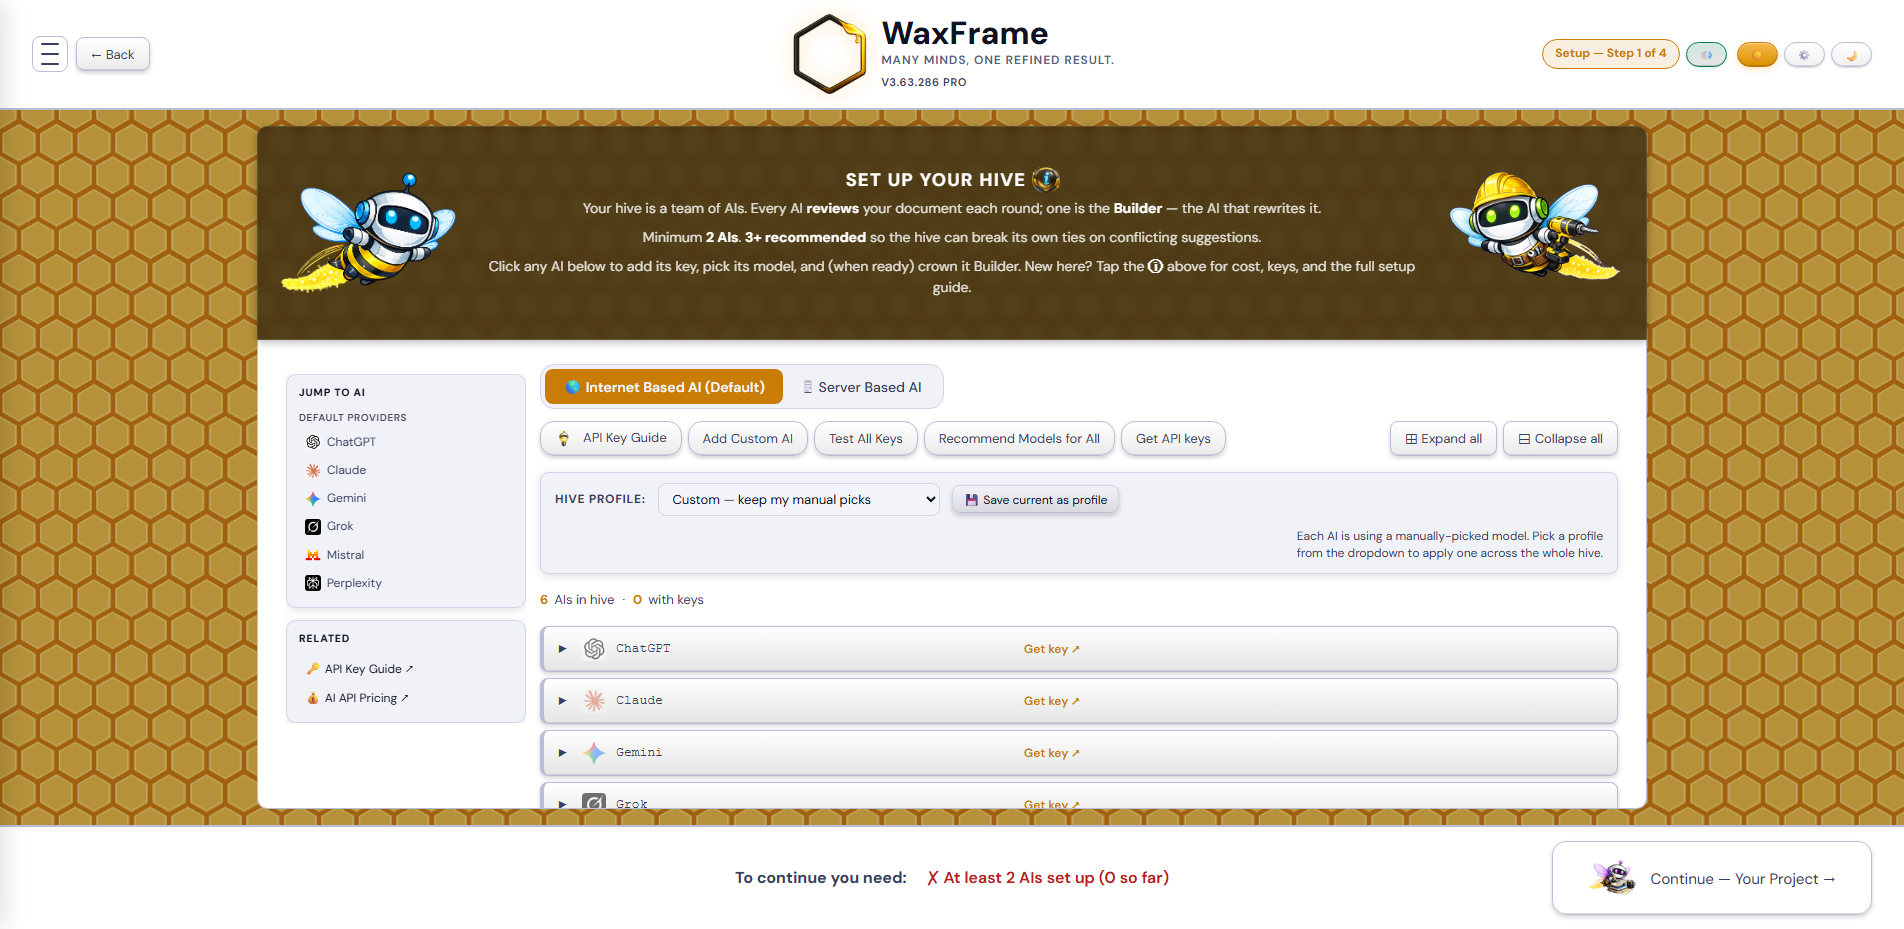
After clicking Let's get started → on the welcome screen, you arrive at the first setup screen: Worker Bees. This is a full-width screen dedicated to connecting your AI assistants. Your Worker Bees are the AI assistants that act as reviewers each round. They each read your document independently and produce a numbered list of specific suggestions. You need at least two Worker Bees with saved API keys before WaxFrame will allow you to proceed — but three or more is the empirical recommendation because runs converge faster with three reviewers and reviewer disagreements get resolved automatically by majority instead of pausing the run for your decision. A status indicator at the bottom of the screen shows whether the minimum is met.
Directly above the list of AIs, a hive count chip shows the total number of AIs in your hive and how many of them have saved API keys. This is purely informational — WaxFrame's convergence logic is a threshold check (a majority of the hive must agree on "no more changes"), not an either-or vote between competing proposals, so there is no tie risk on convergence regardless of whether your count is even or odd. (This is different from how reviewers resolve specific change disagreements during a round — with only two reviewers a disagreement can tie and pause the run for your decision, which is why three or more is recommended. See Step 5 below.)
WaxFrame talks to each AI through its API, not through the consumer chat product you might already pay a monthly fee for. This matters for cost: APIs charge per usage in one-time credits, not as a recurring subscription. You pay only for the tokens you actually send and receive — typically a fraction of a cent per round per reviewer.
Gemini's API is currently free within Google's published rate limits. This makes Gemini a useful free reviewer to anchor your hive, and it's why Gemini-as-Builder is a common starting configuration. The other five default providers — ChatGPT (OpenAI), Claude (Anthropic), Mistral, xAI (Grok), Perplexity — each require a one-time minimum API credit purchase, typically starting at $5. Once loaded, the credit stays in your account and only depletes as you actually use the API; an unused credit doesn't expire monthly the way an unused subscription month does.
Gemini free tier vs paid tier — a real trade-off, not just a price. Gemini's free tier applies only while your Google AI Studio account has billing disabled. Add a card and enable billing and Gemini requests route through paid-tier paths and charge per token, even if you meant to stay free. The Builder role amplifies the cost because it reads project setup, reference material, the full working document and every reviewer's suggestions each round, then writes the document back out — a long multi-round session with paid Gemini as Builder can run to a few dollars.
The cost is only half the decision, though. Under Google's API terms, content sent on the free tier is used to develop and improve Google's products, and human reviewers may read it. On the paid tier it is not used for product improvement. WaxFrame's whole job is putting your documents through these APIs, so the free tier means your working document is training data that a person may read. Weigh that against the per-token cost and decide per document, not once and forever: the free tier is fine for a blog post or a cover letter, and worth avoiding for anything confidential, commercially sensitive, or written for a client. The same distinction exists at most providers — check the terms for any AI you add, and see the Privacy page for what WaxFrame itself does and does not send.
Whichever tier you choose, check the AI Studio usage page(opens in a new tab) after longer runs. If you want Gemini in the hive but not the bill, keeping it as a Reviewer rather than the Builder is the lighter token load. If you want both a free reviewer and paid access to Gemini's larger models, use two separate Google projects — one with billing disabled, one with it enabled — because enabling billing on a project applies to that whole project.
Practical cost ladder:
For context: the equivalent consumer subscription stack — ChatGPT Plus, Claude Pro, Gemini Advanced, and the paid tiers of Perplexity, xAI, and Mistral combined — runs around $120 per month. WaxFrame's API-based approach is dramatically cheaper for document refinement because you only pay for the tokens you process, not for unused capacity.
If you're cost-conscious, the temptation is to stop at the $5 minimum (one paid provider + free Gemini). That works — you'll meet the 2-AI requirement and complete real document runs — but the jump from about $5 to about $10 in one-time credits (adding one more paid provider) buys you the 3+ hive that our reference testing (the Brightwater Canoe and Kayak business-proposal runs, detailed in Setup 1) showed converges faster and resolves disagreements automatically. The $5 difference is the gap between "barely works" and "works reliably."
Directly under the Your Worker Bees heading and above the toolbar, two big buttons toggle the screen between two modes. The active one is highlighted:
Flipping the toggle filters the visible AI list and rebuilds the toolbar — the underlying inventory is unchanged. You can move freely between modes without losing anything.
In Internet mode (the default), the toolbar across the top of the Worker Bees panel shows five buttons followed by two compact row controls on the right. In order, left to right:
In Server mode, the toolbar shows a narrower set of buttons appropriate for managing AIs imported from a model server:
Not in Server mode: the API Key Guide button (the default-provider key-acquisition flow doesn't apply), Recommend Models for All (server-hosted models are picked by your gateway operator, not by web research), and Get API keys (server endpoints don't expose individual provider consoles).
Once you've added at least one custom AI (via Add Custom AI or Import from Model Server), a small toolbar appears between the main toolbar and the AI list. It exists for removing customs in batch instead of one at a time. When no customs exist, this row is hidden and the AI list sits directly under the main toolbar.
The toolbar shows:
Below the toolbars is the list of your Worker Bees. By default, six AIs are shown in Internet mode: ChatGPT, Claude, Mistral, Gemini, Grok, and Perplexity. Each AI is a collapsible row with two states.
Collapsed (default state) — the row shows just the basics:
Expanded state — clicking the row reveals the setup panel, containing all the controls for entering a key and picking a model:
gpt-5.5 for ChatGPT or claude-sonnet-4-6 for Claude. Click the dropdown to see available models fetched directly from that provider. If you've run Recommend Models for All, two picks in the dropdown are labeled ✨ Reviewer and 🔨 Builder — look for the words, not just the icons. The explanation lines below the dropdown are color-coded to match: gold for the Reviewer pick, blue for the Builder pick. WaxFrame uses sensible defaults; you don't need to change this unless you have a specific reason.
Do not have API keys yet? Click the API Key Guide button in the toolbar above the list — it has direct links to each provider's signup page and walks you through getting a key for each one.
At the very bottom of the Setup screen, a status bar shows exactly what is still needed before you can continue. It reads: To continue you need: followed by two indicators:
The Continue — Your Project → button at the bottom right of the screen remains inactive until both indicators are green.
Model diversity matters more than model count. The reviewer hive works because each AI has different training, different biases, and a different sense of what "good" looks like. A hive of six AIs that are all running the same underlying model (or near-identical fine-tunes of the same family) is functionally one reviewer with six voices — convergence happens fast because they were never going to disagree, but the result is no better than a one-shot. Use the Recommend Models for All button if you're unsure which provider models to pick; just check the picks afterward and override any that landed on the same family. Minimum rule: at least two distinct model families in your hive (e.g., ChatGPT + Claude, or Claude + Gemini). Three or more is better.
WaxFrame used to have a separate "Choose Your Builder" screen as Setup 2. Builder selection now happens directly on the Setup 1 — Set up your hive screen, via the 🔨 Builder button on each AI row.
The Builder is the AI that rewrites your document each round. It plays two roles:
The Builder reads the entire document plus all reviewer suggestions every round, so it consumes more tokens than any individual reviewer. Pick an AI with a paid API key and enough token capacity. Claude, ChatGPT, Gemini, and DeepSeek all handle large documents reliably; DeepSeek offers excellent output at a lower cost. You can change your Builder anytime — from Setup 1 by clicking 🔨 Builder on a different AI's row, or from the Work screen via the Change Builder button.
↑ Back to top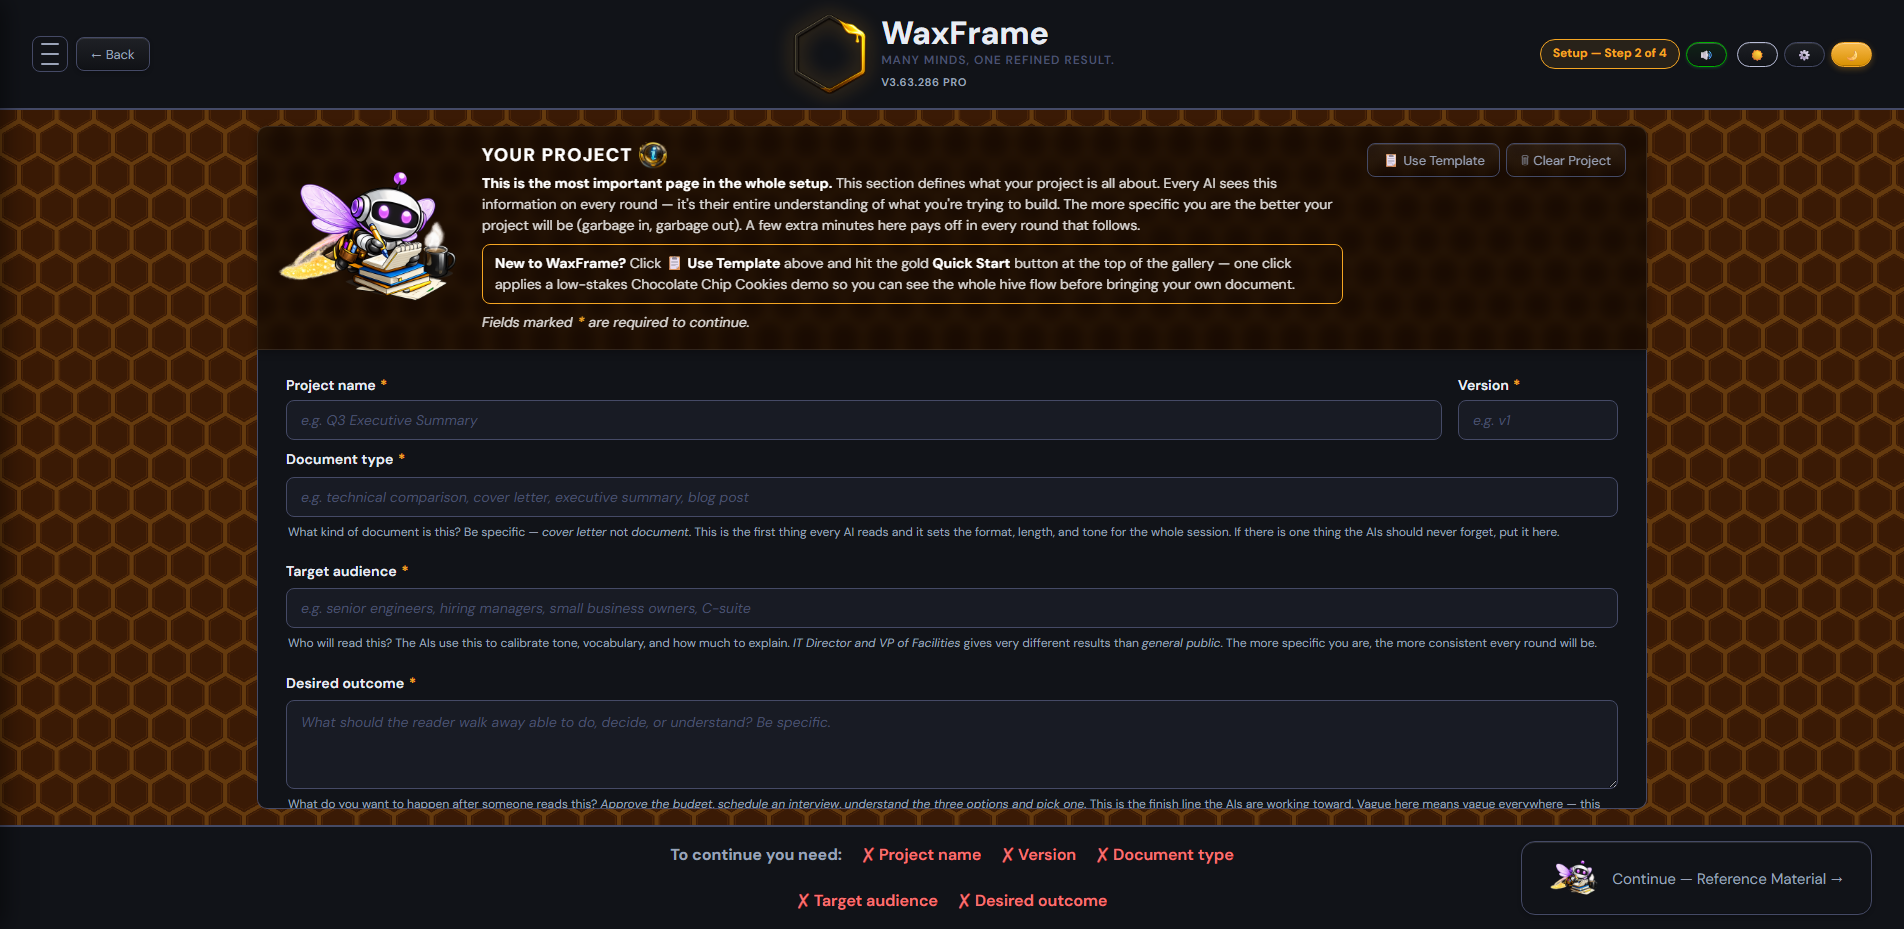
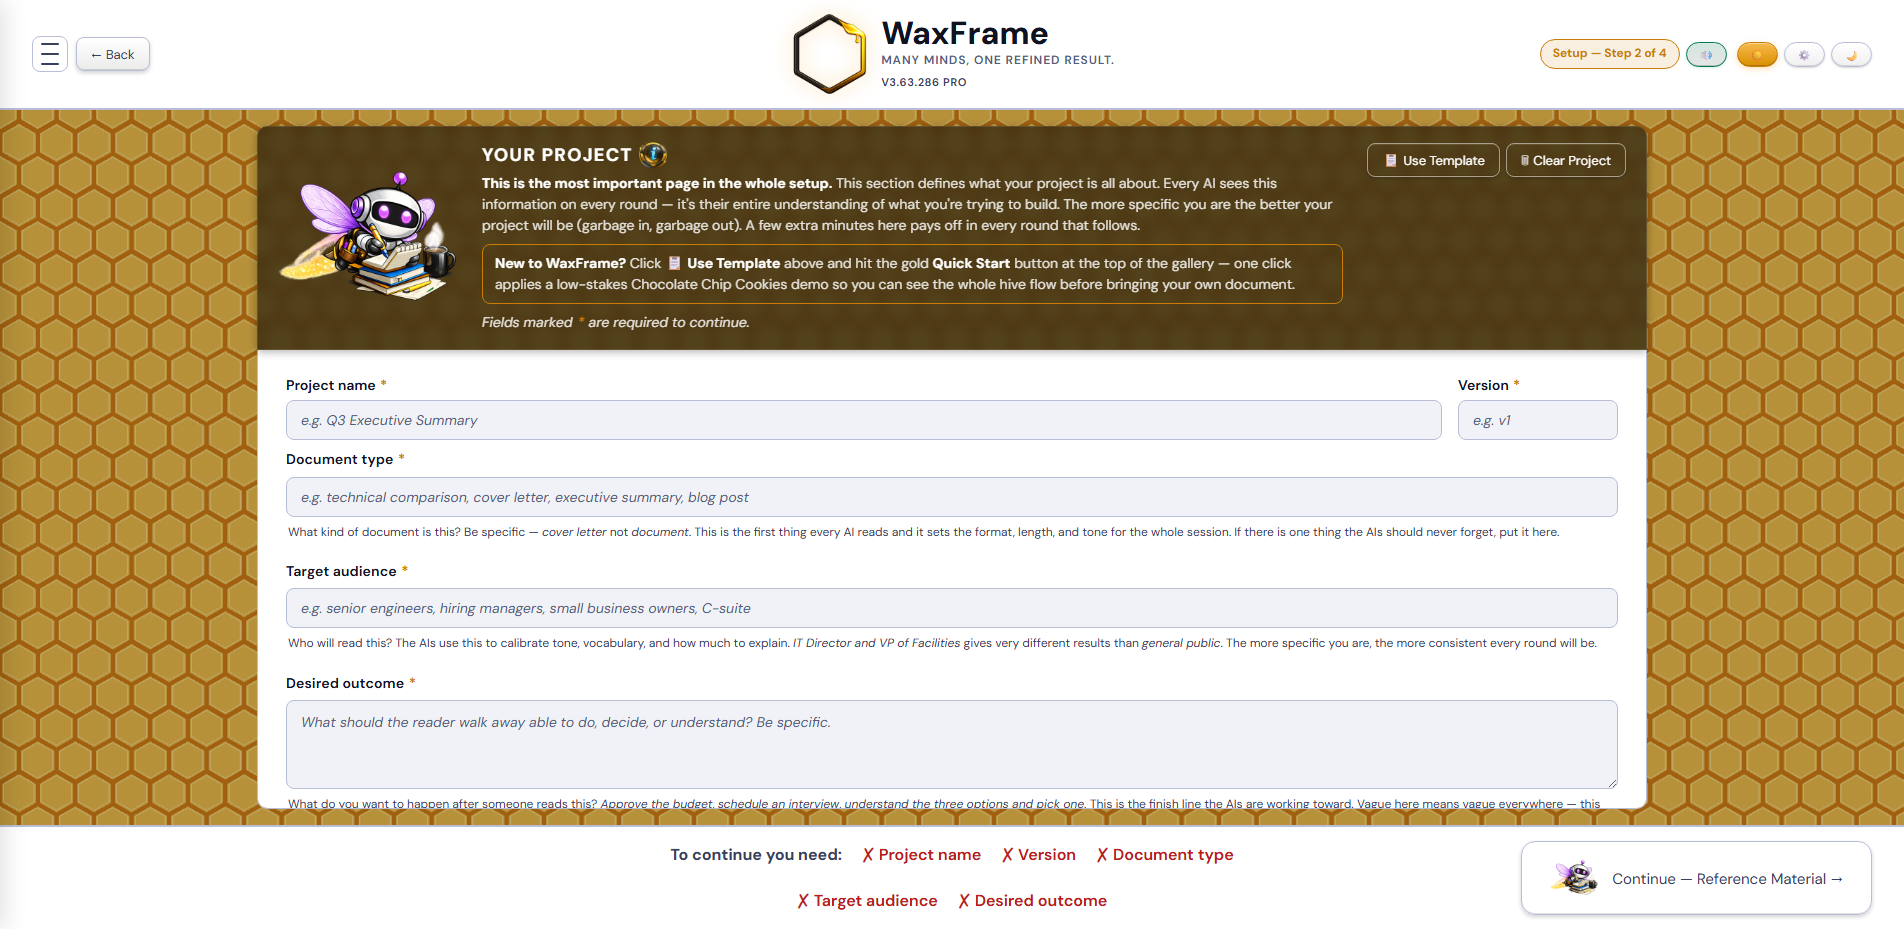
Setup 2 — Your Project — is a single scrollable screen. At the top is your project name and version, followed by the Project Goal section with six structured fields. Work through the fields top to bottom.
You can either fill in the goal fields manually, or click 📋 Use Template in the section header to pre-fill them from a curated library of document types. First time here? Open 📋 Use Template and click the gold "Quick Start" button at the top of the gallery — one click applies a low-stakes Chocolate Chip Cookies demo project. Same flow as any real document; small enough to see convergence quickly and harmless enough to focus on learning the workflow.
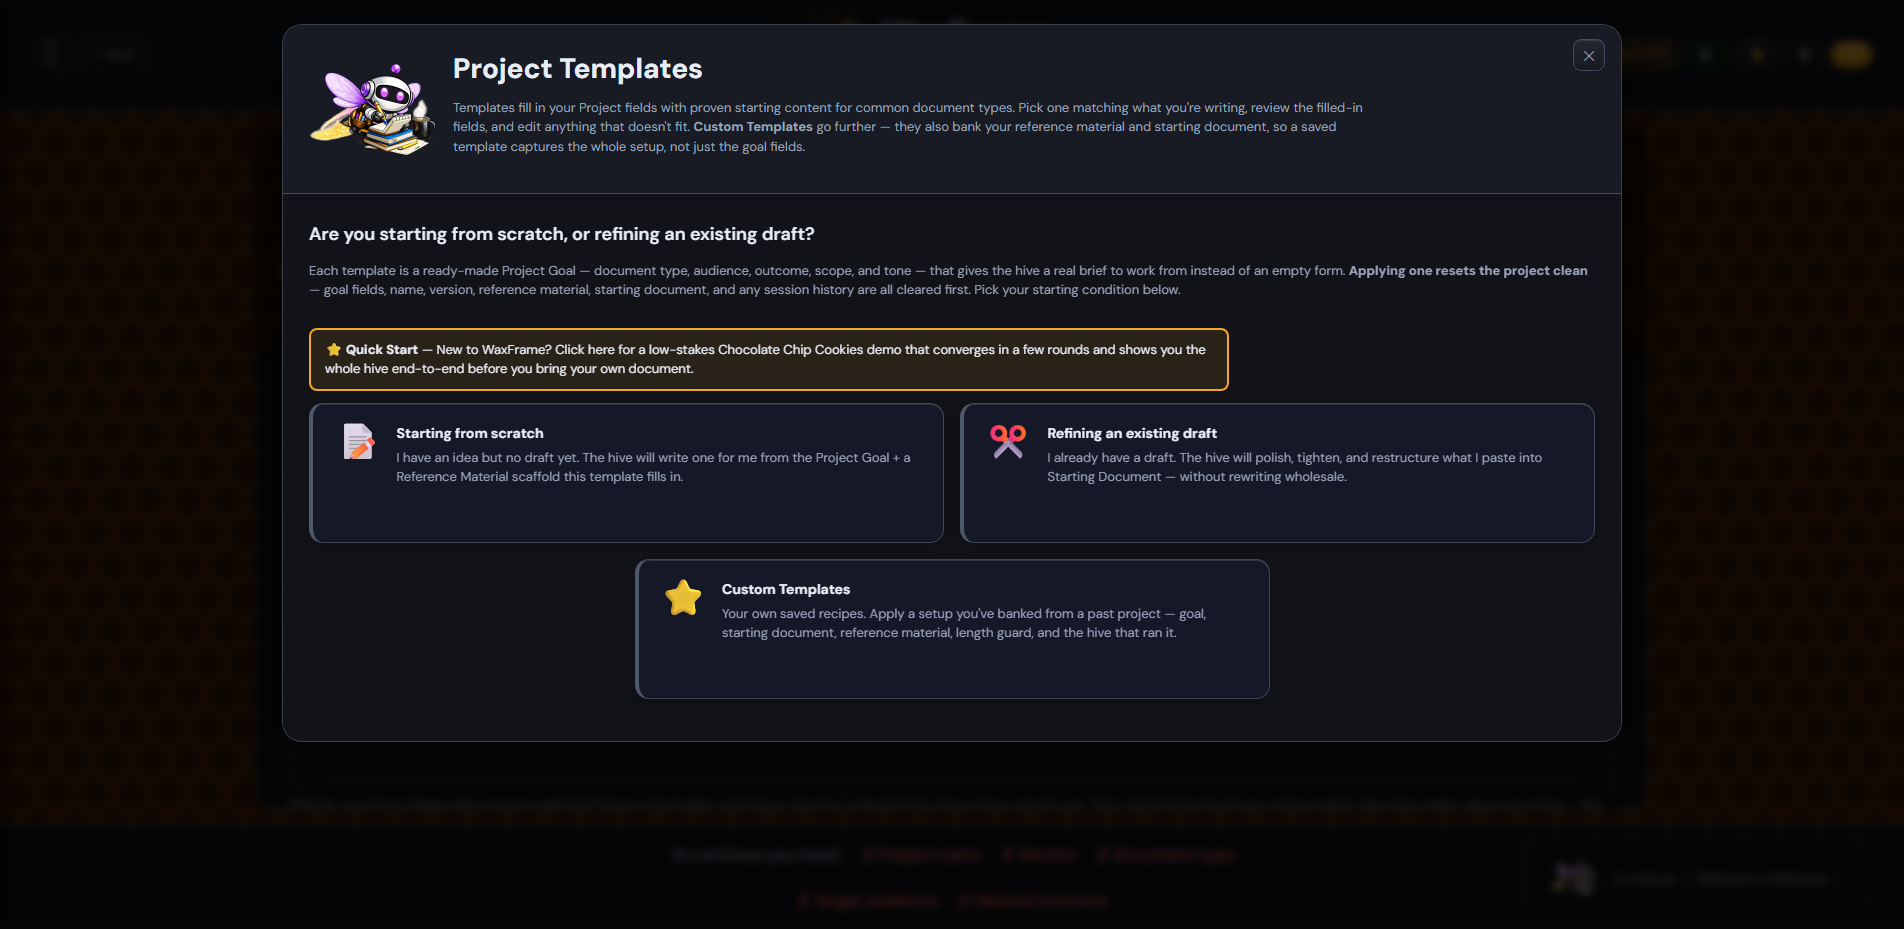
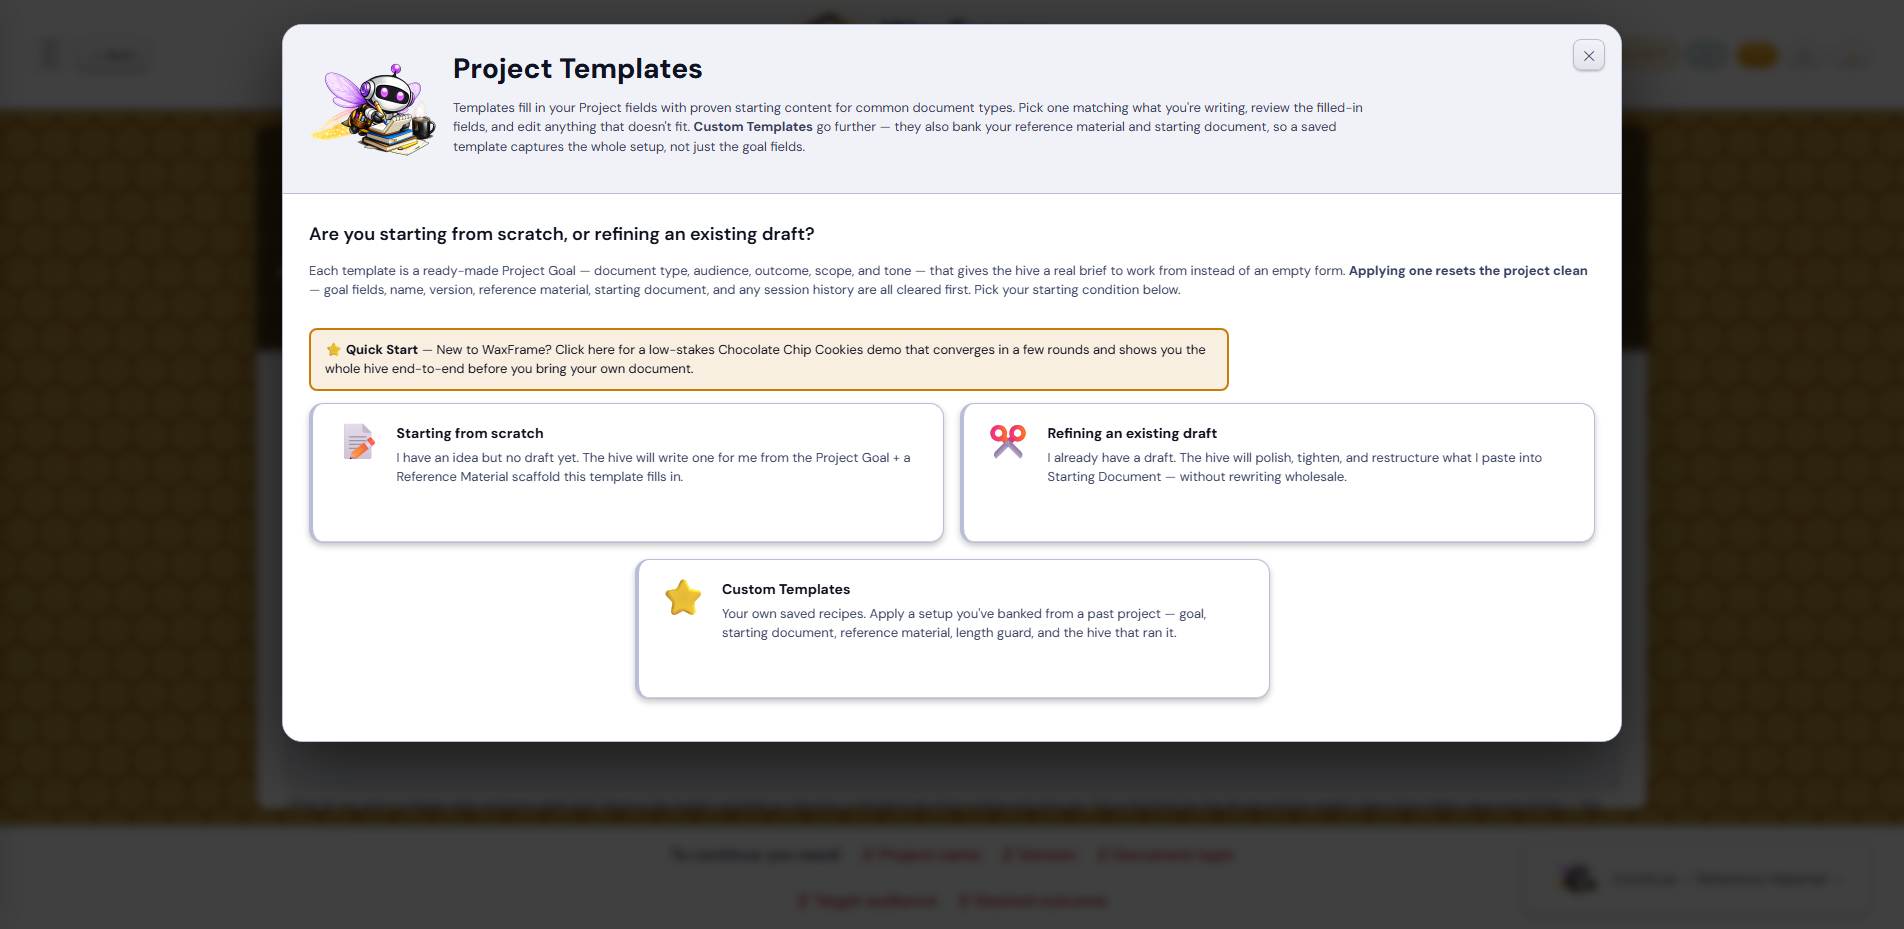
The 📋 Use Template button at the top of the Project section opens a gallery of 19 templates organised into 6 categories (browse the full Template Catalog for descriptions of every template and its reference scaffold). The gallery first asks whether you are starting from scratch or refining an existing draft (the path picker), then shows the templates that fit your chosen path. Click any card to populate all six Project Goal fields with proven starting content for that document type.
| Category | Templates |
|---|---|
| Quick Start | ⭐ Quick Start (chocolate chip cookies — recommended for new users; scratch path only) |
| Career & Hiring | ✉️ Cover Letter · 🔍 Job Description · 📄 Résumé · 🔗 LinkedIn About · 🙏 Thank-You Letter |
| Business & Sales | 💼 Business Proposal · 📬 Email & Outreach · 📊 Executive Summary · 📋 RFP Response |
| Content & Marketing | 📝 Blog Post / Article · 🖥️ Presentation Outline · 💼 LinkedIn Post |
| Personal & Everyday | 🍳 Recipe · 🧾 Contractor / Vendor Letter |
| Reviews & Recommendations | 📦 Product Review · 🍽️ Restaurant Review · 🏨 Hotel Review · 🧾 Business / Service Review · ✈️ Trim to TripAdvisor · 📍 Trim to Google Maps · 💬 Rewrite as Yelp (the three platform templates are refine-only — they reshape an existing review) |
How template apply works. Click a card → if the Goal fields are empty, the template populates silently. If any field has content, a confirmation prompt appears warning that current entries will be replaced. Project name, version, length constraint, Reference Material, and Starting Document are never touched — only the six Goal fields.
Template Hint banner. Most templates contain [bracketed] placeholders the user must fill in — for example [company name] or [job title]. After applying a template with placeholders, an amber-bordered banner appears above the Project Name with a per-field bulleted list telling you exactly which form field to look at and what to fix there. Templates that ship clean (Quick Start, Executive Summary) skip the banner entirely.
Templates are starting points — every field can still be edited after the template populates. Treat the populated content as a strong first draft, then tailor it to your specific situation. The full set of templates is also documented as standalone playbooks in the Document Playbooks.
At the top of the screen, below the intro, is the project name field. Type a name for your project here. This name is used in the export filename and appears in the round history. It has no effect on how the AIs work — it is purely for your own organisation. Examples: Q3 Board Report, Marketing Email — Product Launch, Cover Letter — Senior Engineer Role.
The smaller field next to the project name has the placeholder text Version — e.g. v1. Enter a version identifier here. This is also used in the export filename. Use whatever versioning makes sense to you — v1, draft1, 2.0, final. Like the project name, it does not affect how the AIs work.
Below the goal fields is a section headed Length Constraint. This is where you tell WaxFrame what kind of length rule applies to your document — not in the goal fields. As of v3.33.0 there are four modes covering the common cases:
| Mode | What it does | When to use it |
|---|---|---|
| No limit | No length gating. Reviewers and Builder receive no length instruction. No round-end or convergence-time guards fire. | Default for documents where length is irrelevant or you want the hive to choose what fits. |
| Hard cap | Ceiling only. The Builder is told "stay at or below the limit; shorter is fine." Round-end and convergence-time guards fire only when the document goes over. | Documents with a maximum but no minimum — a tweet under 280 characters, a cover letter under 500 words, a report under 10 pages. |
| Target | Aim to hit the target value exactly. Both ceiling and floor guards are armed against the same value. Round-end checks are trajectory-aware so you only get prompted on rounds that move away from the target — a Builder converging from 320 down to 305 toward a 300-word target won't nag you, but a Builder going 305 to 320 will. | Documents where you want the hive aiming at a specific length — a 500-word essay, a 10-line poem, a strict word-count submission. |
| Range | Stay between a minimum and a maximum that you supply. The Builder is told "aim for the middle of that range." Both guards armed against their respective bounds. | Documents with both a floor and a ceiling — "between 800 and 1200 words", "3 to 5 paragraphs", "2 to 4 pages". |
Important: put your length rule here — not in the Scope & constraints goal field. If you put "under 200 words" in your goal text, the AIs receive it as loose instruction mixed in with everything else, and it is easy to miss. When you pick a mode here, WaxFrame formats and enforces it explicitly in every round as a hard constraint separate from the rest of your goal.
The word count shown in the document stats bar above the Working Document updates live as the document changes. Use it to verify the constraint is being respected after each round.
Behind the scenes, after the Builder returns each round, WaxFrame measures the output in the exact unit you chose. If the result violates your active mode (over the cap, away from the target, outside the range), the gate prompts you with three options: Discard the round, Keep it anyway, or Continue anyway (which disables the guard for the rest of the project). The prior document is preserved on Discard — you never lose work to a gate failure. Here is how each unit is counted:
| Unit | How it is counted | Notes |
|---|---|---|
| Characters | Every character in the text, including spaces. | Matches how web forms, SMS counters, and social media count. Accurate for plain English. Emoji and complex scripts can count differently than what appears on screen. |
| Words | Tokens separated by whitespace. | Matches how most submission forms count. Can differ from Microsoft Word by 1–2% on hyphenated terms or URLs. For hard ceilings elsewhere, trim a few words under your target as a buffer. |
| Paragraphs | Blocks of text separated by blank lines. | Matches how markdown, plain text, and Word documents denote paragraph breaks. Headings and bullet lists count as paragraphs if they are separated by blank lines. |
| Pages | Approximated using 600 words per single-spaced 12pt page (industry-standard typewriter math — Word's default and what most word processors round to). 1 page ≈ 600 words, 2 pages ≈ 1200 words, 5 pages ≈ 3000 words. | This is the one unit WaxFrame cannot measure directly — actual page count depends on your font, margins, and line spacing. For firm limits (court filings, one-page résumés), aim slightly under the target to leave headroom. |
The convergence-time gate is symmetric: when the hive converges (unanimous or majority), WaxFrame checks the final document against your mode's bounds before celebrating. If the doc is over a cap, under a target, or outside a range, you get the same three-option prompt — Discard returns you to the work screen to edit and re-run, Keep accepts the convergence, Continue anyway accepts and silences the guard for the rest of the project session.
Who actually responds to length directives. Reviewers focus on prose quality — clarity, structure, persuasion, accuracy — and do not address length. Only the Builder responds to length directives, including the ✂ Trim, 📈 Expand, and 📐 Match Notes templates. If the document consistently overshoots your target across multiple reviewer rounds, that is expected — the reviewers are doing their job and the Builder is the lever for size. The standard playbook: wait for a round where reviewers signal they are done with prose changes, then run a Builder-Only round with the ✂ Trim template injected to compress the output. Real-world reference: a 1499-word document compressed to 1083 words (a 27.6% reduction) in a single Builder-Only round with one Trim injection.
If you projects from before v3.33.0 (the mode picker addition), the migration assumes Hard cap mode if you had a length set, or No limit if you didn't. Open the project on the Setup 2 screen, look at the active pill, and switch modes if you want different behavior.
Below the project name and version is the Project Goal section — six labelled fields assembled into a structured brief that every AI reads before each round. You do not need to fill all six — even two or three give the hive a strong foundation. Here is what each field is for:
| Field | What to write |
|---|---|
| Document type | State the format clearly — a business proposal, a technical comparison, a cover letter, an executive summary. This is the first thing assembled into the brief and is always included when a document exists. |
| Target audience | Who will read this? IT Director, hiring manager, VP of Facilities, small business owners? The audience shapes the tone, language, and depth every AI uses. |
| Desired outcome | What do you want the reader to walk away able to do, decide, or understand? Give the AIs a finish line. |
| Scope & constraints | What must be covered — and what should be left out? AIs expand into adjacent topics unless you draw the boundary clearly. If you want wireless only and not switching or routing, say so here. |
| Tone & voice | Formal or conversational? Technical or plain-English? Confident or cautious? The more specific, the more consistent the output will be across rounds. |
| Additional instructions | Anything else the AIs need to know — style preferences, things to avoid, structure requirements, sections that must not be changed. |
Every AI reads your assembled brief before touching your document. The goal works identically whether you are uploading a file, pasting text, or starting from scratch. The difference is only in what the AIs have to work with — not in how the brief is applied.
Vague fields produce a vague document. Specific, detailed fields produce something you can actually use.
The goal works the same whether you are uploading an existing document, pasting text, or starting from scratch. The AIs have nothing else to work from — no access to the internet, no knowledge of your organisation, no understanding of what you want unless you tell them. The more you put in, the better every round will be.
The most common mistake is writing a goal so short and vague that the AIs have to guess. They will guess — and they will all guess differently, which produces drift and conflicts that never resolve.
Too vague "Make this proposal better."
Much better "This is a wireless network infrastructure upgrade proposal for a 950,000 sq ft warehouse. Audience: IT Director (technical) and VP of Facilities (budget-focused). The technical sections and vendor comparison table are solid — do not change them. Focus all improvements on the executive summary, which is too long and too jargon-heavy for the VP, and on the cost justification section, which needs a clearer ROI narrative. Tone: confident and direct, not salesy. Do not add any new sections."
Too vague "Write a report about wireless networking."
Much better "Technical comparison of enterprise wireless networking platforms — HPE Aruba, Cisco Meraki, Juniper Mist, and Extreme Networks. Audience: IT infrastructure team evaluating a campus-wide refresh. Scope: strictly wireless — APs, controllers, cloud management, licensing. Exclude switching, routing, firewalls. Tone: technical and neutral. Include a summary comparison table at the top, a dedicated section per vendor covering strengths, weaknesses, and pricing, then a shortlist recommendation."
Not sure what to write? The Document Playbooks has ready-made goals for common document types. Open it from the Menu.
Do not put a target length in the goal. Use the Length Constraint field below the goal instead — WaxFrame sends it automatically in a standardised format every round.
| Field | What it controls | Tips |
|---|---|---|
| Document type | Sets the format, length conventions, and depth every AI aims for on every round. This is the first thing assembled into the brief and is always sent. | Be specific. Cover letter not document. If there is one thing the AIs should never forget, make it part of this field. |
| Target audience | Calibrates tone, vocabulary, and how much to explain. Without it, different AIs write for different audiences and the document becomes inconsistent. | IT Director and VP of Facilities is better than business audience. Specify seniority, technical level, and any split audience. |
| Desired outcome | Gives the AIs a finish line. The most impactful field — this is what every suggestion and every rewrite is ultimately working toward. | Approve the budget, schedule an interview, understand the three options and pick one. Vague here means vague everywhere. |
| Scope & constraints | Draws the fence. AIs expand into adjacent topics unless you stop them explicitly. | Cover both sides — what must be included and what must not. Wireless only — no switching, routing, or security products. |
| Tone & voice | Prevents tone drift across rounds when multiple AIs are writing in different styles. | A few adjectives is a floor. Richer is better: Direct and confident, not stiff — like a peer they'd want to work with. Say what to sound like, what to avoid, and who's reading. |
| Additional instructions | Hard rules that must survive every round — things the AIs must always or never do regardless of what the document looks like. | Do not add new sections. Never change the numbers in the cost table. Always use Oxford commas. For one-round-only instructions, use the Notes drawer on the Work screen instead. |
Below the goal fields are two clear buttons:
Setup specificity drives convergence speed more than starting-document quality. Same hive, same topic, same starting document — but a project with specific Target Audience, anchored Desired Outcome, narrow Scope, defined Tone, and explicit Additional Instructions converges in a fraction of the rounds compared to one with generic fields. Empirical example from session 2026-05-07: v1.0 with 243-character goalNotes and anchored persona converged in 5 rounds. v2.0 with 48-character goalNotes and generic tone on the same topic ran 37 rounds without converging. Fill every field as if you were briefing a senior contractor — say what good looks like, what the constraints are, and what definitely is not in scope. The hive cannot read your mind; vague setup forces reviewers to invent their own version of the answer, and they invent different answers, which is what conflicts are.
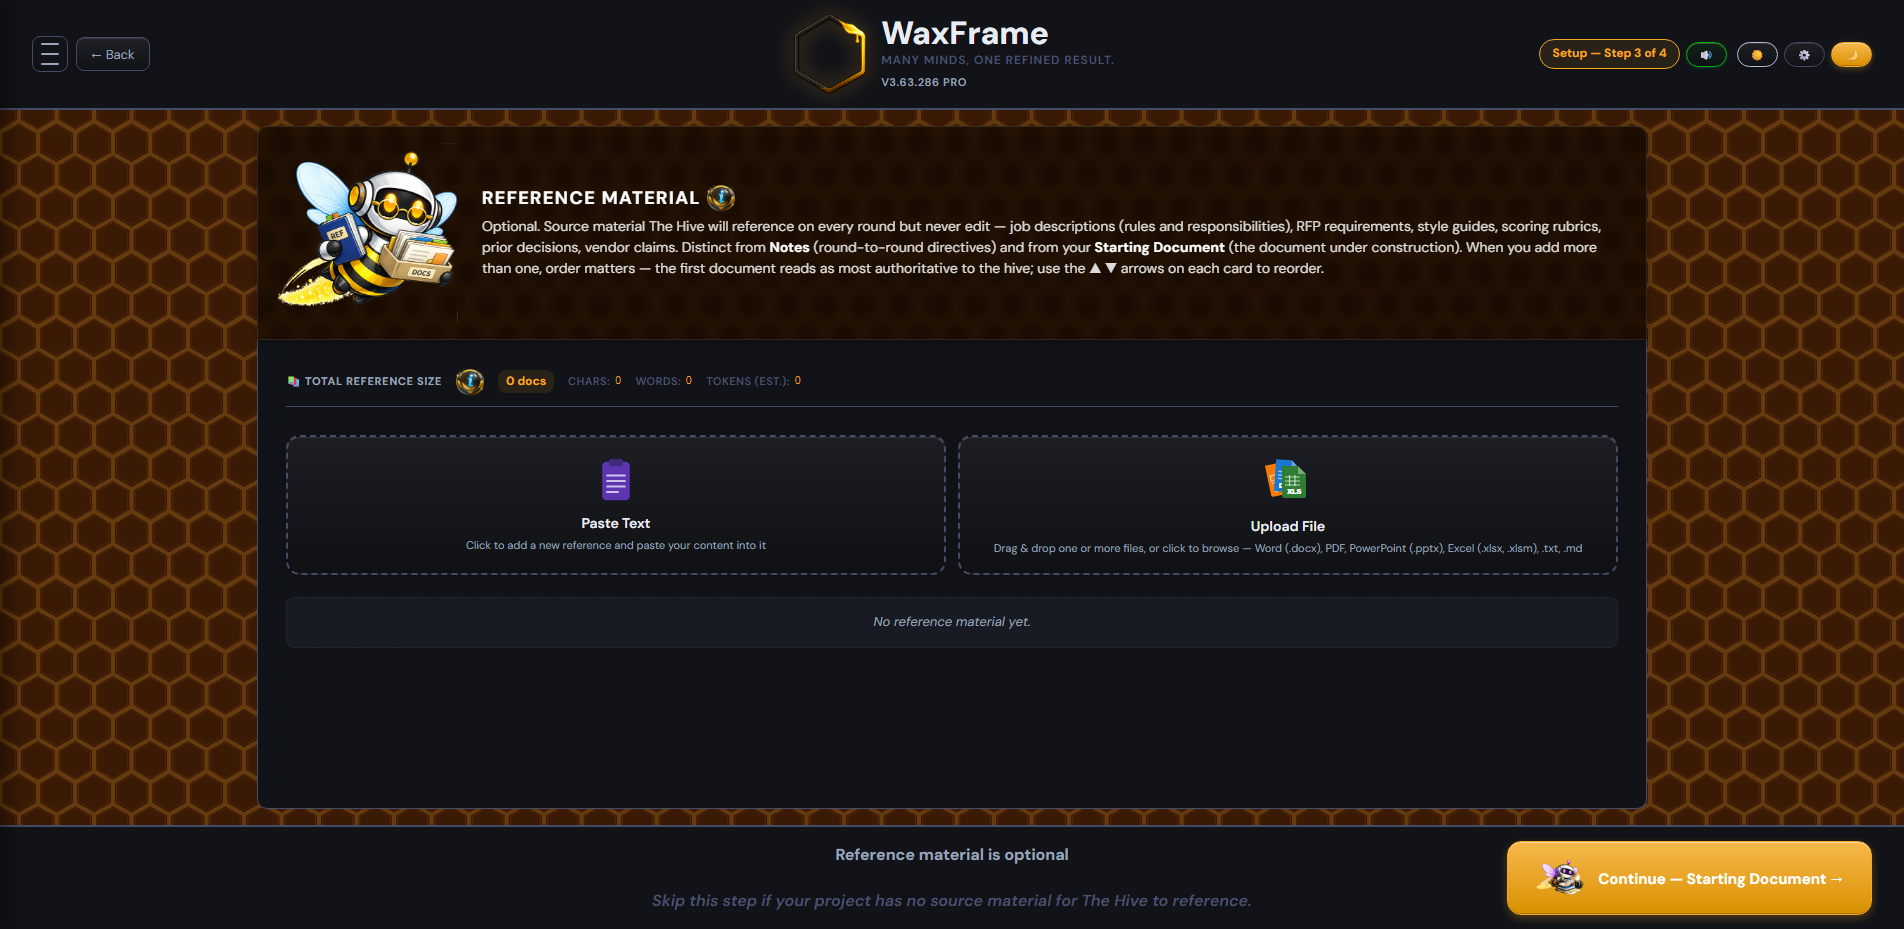
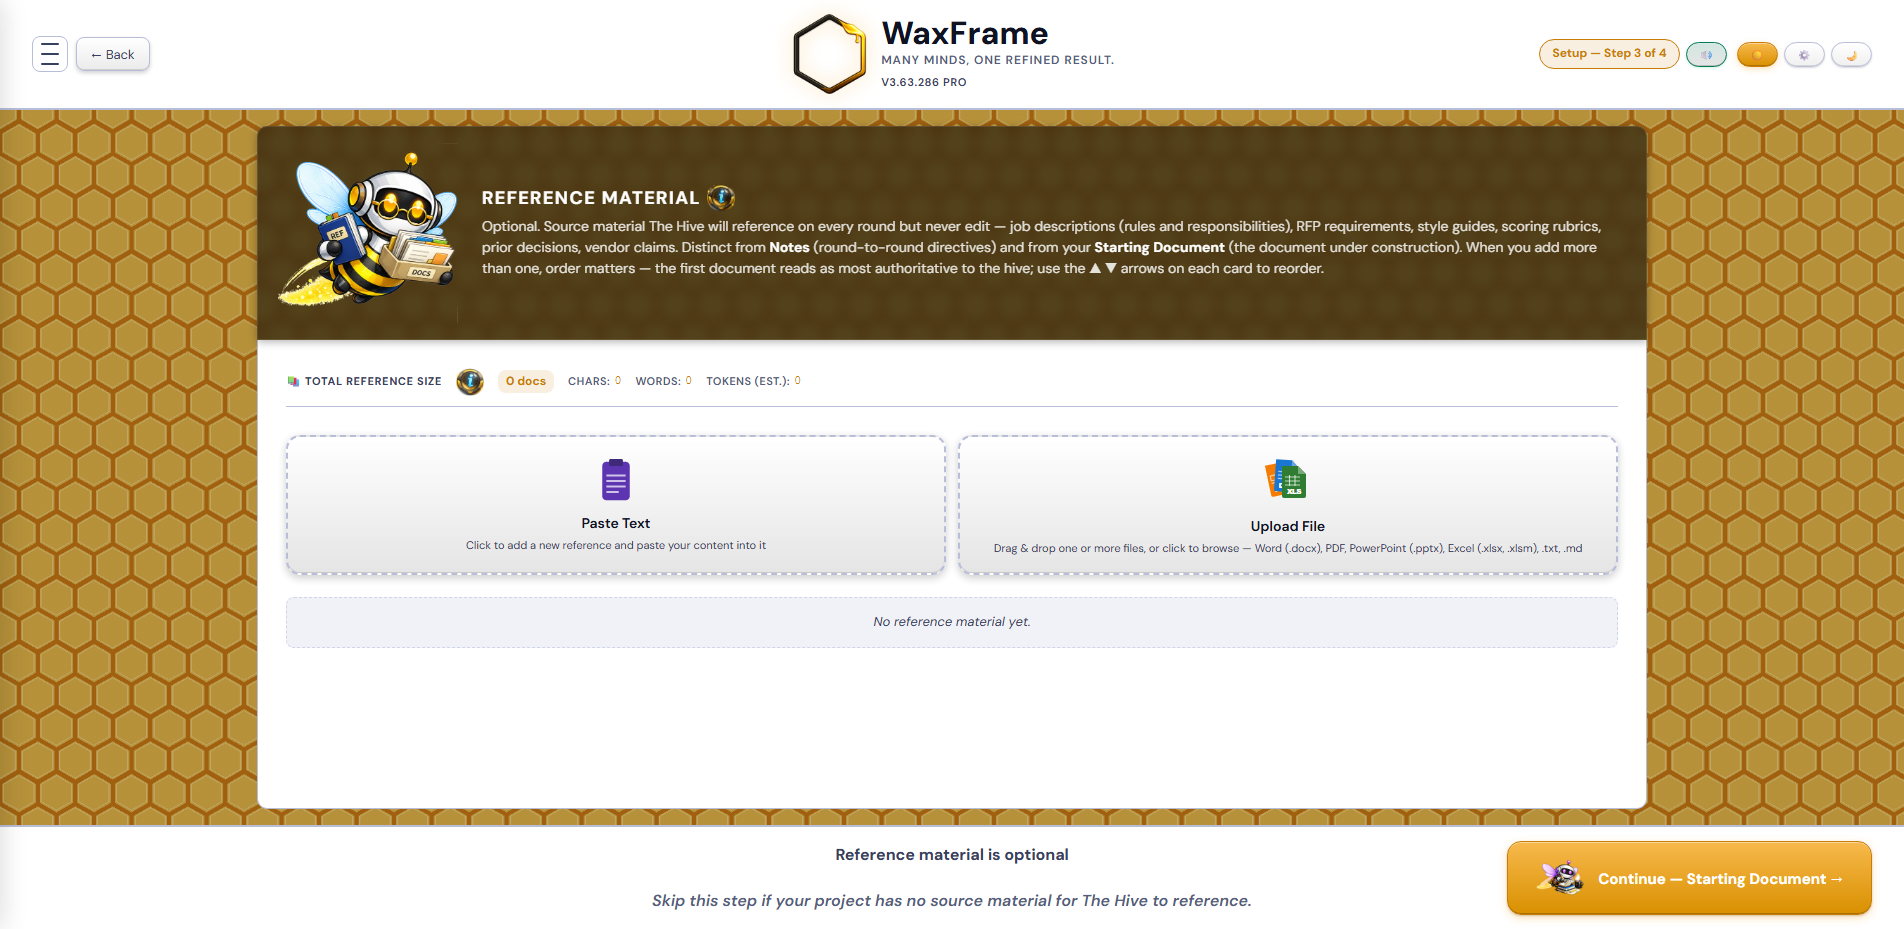
After continuing from the Your Project screen, you arrive at Setup 3: Reference Material. This is a full-width screen with a small ⓘ info button next to the heading. Reference material is optional — most projects do not need it. The Continue button is always active and you can skip the screen entirely if your project has no source material to cite against.
This screen is where you provide source documentation that the hive should consult on every round but never edit. The hive sees this content alongside your starting document, but the prompt explicitly tells every reviewer and the Builder to treat it as read-only authoritative source — not as something to rewrite.
Reference material is the right tool when there is a specific document the hive needs to cross-check against. Common cases:
Most short documents do not need reference material. A cookie recipe, a thank-you note, a personal blog post, or a quick email rarely has external source material to cite against. If you cannot name what the hive would be checking against, leave Setup 3 empty and continue.
Three places hold instructions or content for the hive. They are distinct, and using the wrong one is a common cause of confusion.
| Field | Role | How the hive treats it |
|---|---|---|
| Project Goal (Setup 2) | Standing target — what you are trying to produce | Sent every round, never changes within a session |
| Reference Material (Setup 3) | Standing source material — what the document must cite against | Sent every round, can be edited mid-session, never edited by the hive |
| Starting Document (Setup 4) | The document under construction | Line-numbered, reviewed, rewritten by the Builder each round |
| Notes (Work screen) | Round-to-round directives for the Builder only | Sent on the next round only; cleared automatically after that round runs |
Setup 3 is built around a list of reference document cards. You can add as many as you need — RFP requirements alongside scoring rubrics, style guides alongside brand voice references, prior decisions alongside vendor claims. Each card is independently named, reorderable (▲ ▼ arrows on the card), removable, and editable. Order matters: the first card reads as most authoritative to the hive, and the hive sees them with labeled section headers in the prompt envelope so AIs can cite specific documents by name.
Two action panels above the reference list let you add new ones:
Each card has the same controls: a position number badge at the top-left (the hive reads cards in the order shown, top-down), a source-icon badge (showing which file type the content came from — DOCX, PDF, paste, etc.), a character / word / token counter, ▲ and ▼ arrow buttons to reorder, and a ✕ remove button. Paste cards have a fully editable textarea below the header row; upload cards are read-only — to replace an uploaded card's content, remove it and re-upload.
A soft warning banner appears at the top of Setup 3 if the total token count across all cards exceeds approximately 150,000. Most provider context windows in 2026 are 100k–1M tokens; the threshold is conservative and informational — it never blocks, just flags genuinely heavy use so you can split across rounds, remove low-priority documents, or switch to a long-context Builder before launching.
Below the input area is a live counter showing characters, words, and an estimated token count. The token estimate uses the rule of thumb characters ÷ 4, which is the standard approximation for English text in OpenAI-family tokenizers. Real tokenizers vary by model, language, and content type — treat the number as an order-of-magnitude estimate, not a precise count. The ⓘ button next to the token count opens a brief explainer with more detail.
Reference material is sent to every reviewer every round. A 5,000-character RFP is roughly 1,250 tokens per request. A six-bee hive running four rounds is 30,000 tokens spent just transmitting the reference material — before any document content, project goal, or response is counted.
Two consequences follow:
For the full breakdown of how tokens are priced and why per-round costs scale the way they do, see the What Are Tokens? guide.
Once you launch a session, the Work screen toolbar shows a new 📚 Reference button between Notes and Finish. Clicking it opens a drawer that slides up from the bottom of the screen, showing the current reference material in an editable textarea with the same character / word / token counter.
Edits saved from this drawer apply to the next round — past rounds keep the snapshot of the reference material that was active when they ran. This is intentional: each entry in Round History stores the reference material as it existed at the moment that round was generated, so the transcript stays internally consistent even if you change the source material between rounds.
The drawer has three actions: 📋 Copy (copies the current text to your clipboard), ✕ Clear (wipes the field with confirmation — does not affect past rounds), and 💾 Save & Close (commits the edit and closes the drawer).
If your reference material grows large mid-session and you notice rounds getting expensive, this is the moment to switch your Builder to a cheaper-per-token model. Go to Menu → Setup 1 — Set up your hive, pick a low-cost option, and continue. The Builder change applies to the next round; past rounds keep their original Builder credit in the transcript.
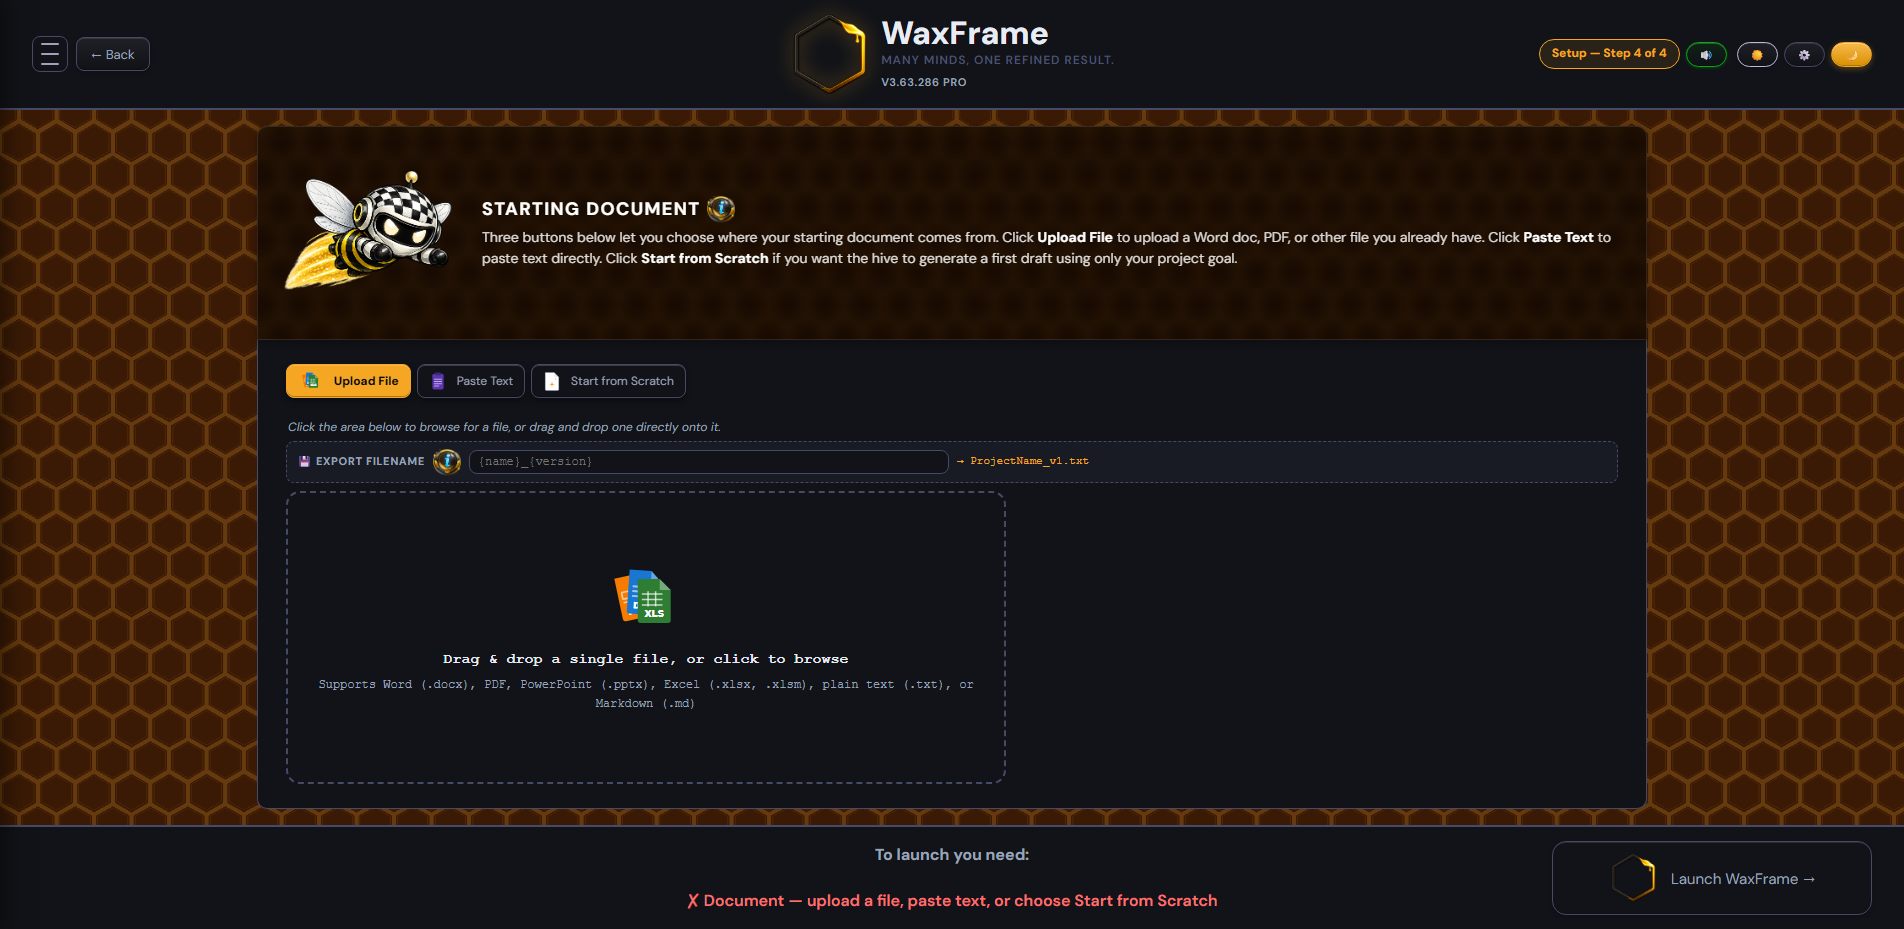
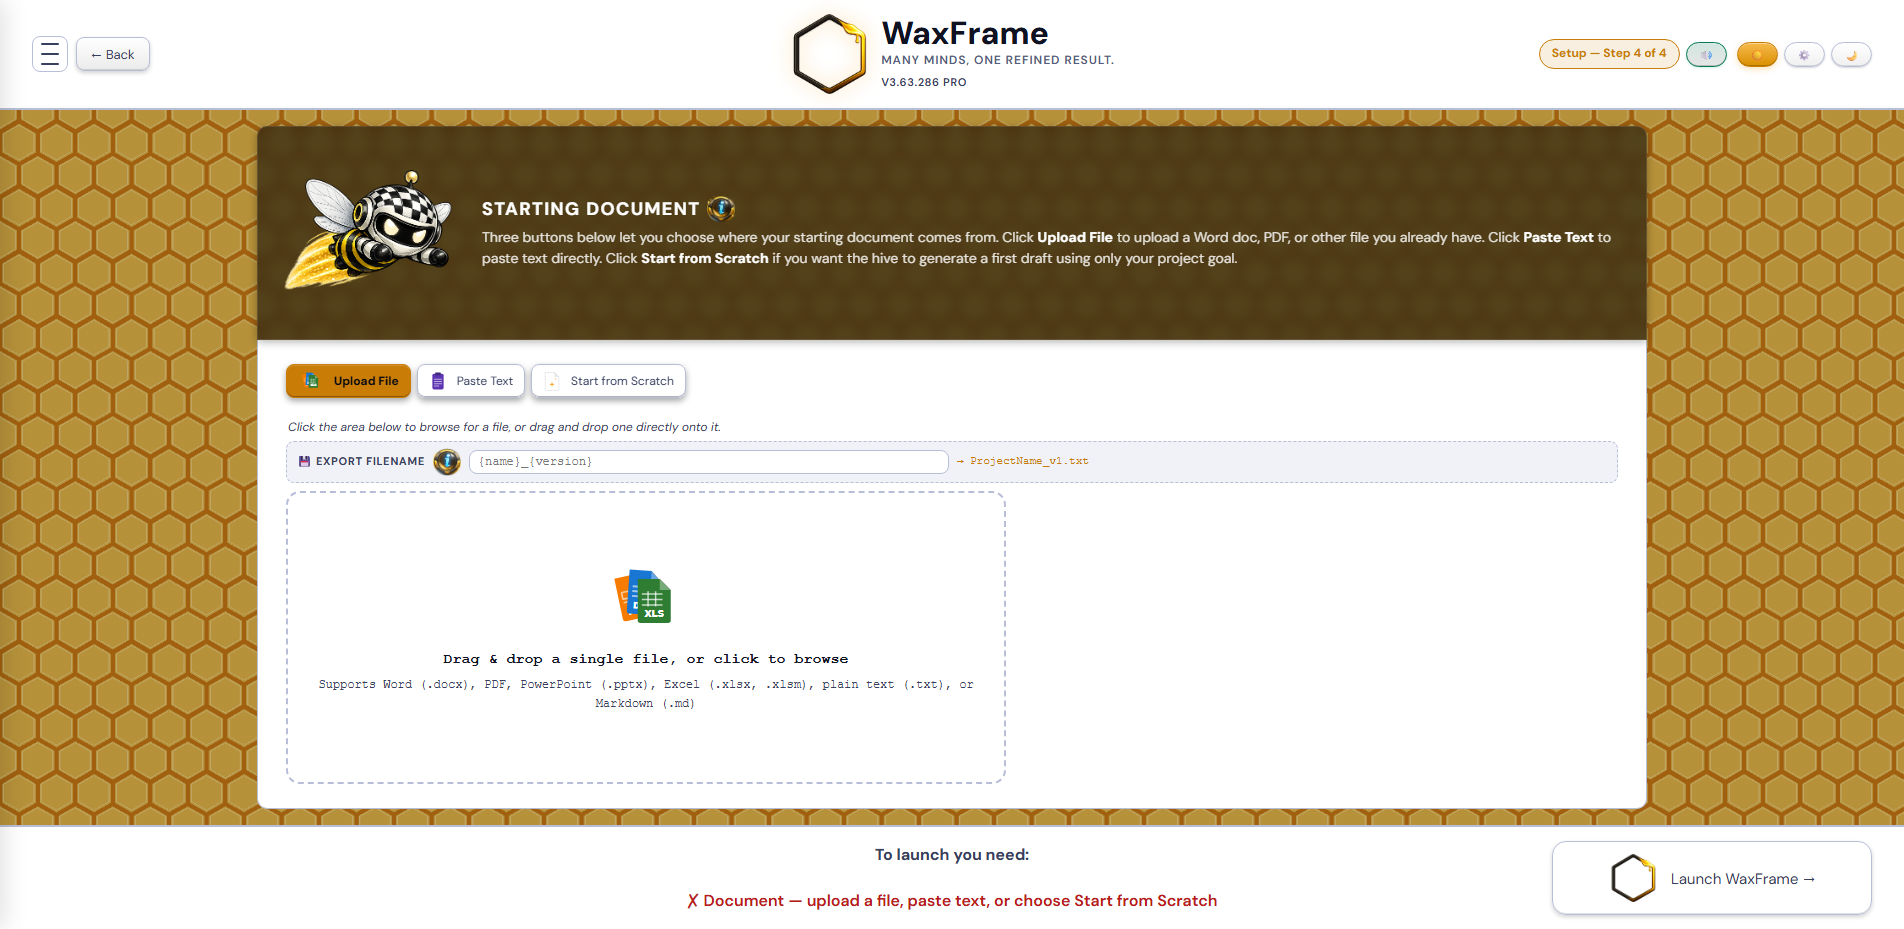
After continuing from the Your Project screen, you arrive at Setup 4: Starting Document. This is a full-width screen with a small ⓘ info button next to the heading. This is where you tell WaxFrame what to work with. There are three ways to provide a starting point, selected using the three buttons at the top of the screen.
Important: These three buttons — Upload File, Paste Text, and Start from Scratch — are mode selectors, not action buttons. Each carries a small distinct icon to its left (a stack of file-type cards for Upload, a clipboard for Paste, a blank-page-with-sparkles for Scratch). Clicking one selects that mode and changes what appears below the buttons. You then interact with the area below them to actually provide your content. A brief instruction line directly below the buttons updates to tell you exactly what to do next.
Below the mode selector buttons and above the content area is a row labelled 💾 Export filename. This field controls what your downloaded document file will be named when you export it at the end of your session. It uses two tokens:
The default value is {name}_{version}, which produces a filename like Q3_Executive_Summary_v1.txt. You can customise this — for example {name}_FINAL_{version} — or leave it as the default. A live preview of the resulting filename appears to the right of the field as you type, using your actual project name and version. Click the small ⓘ button next to the label for a full explanation of available tokens.
Click Upload File to select Upload mode. A drop zone appears below — a dashed bordered area with the text Drag & drop or click to browse. To upload your file:
Supported file formats: Word documents (.docx), PDFs (.pdf), PowerPoint presentations (.pptx), Excel workbooks (.xlsx, .xlsm), plain text files (.txt), and Markdown files (.md). WaxFrame extracts the text content from the file and loads it into the working document automatically. A confirmation message appears below the drop zone once the file is processed successfully, showing the filename and word count. For Excel workbooks with multiple visible sheets, a sheet picker appears and selected sheets are concatenated into a single document with ## Sheet: dividers. For the canonical breakdown of what gets extracted from each format and what does not, see File Ingestion — What Gets Extracted ↓.
PDF tip: PDF extraction works best with standard digitally-created documents — files exported from Word, Google Docs, or similar applications. Scanned documents and PDFs created from images do not contain extractable text and will produce garbled or empty results. If your PDF was scanned, use the Paste Text option instead and copy the text from a version of the document you can select text in.
⚠️ Large file tip: If you import a very large file — a dense report, a long PowerPoint, or any document that produces a very high word count — and a round later fails with a structure error, this usually means the Builder ran out of room to write the whole document back in one response. Since v3.63.494 WaxFrame asks each model for an output budget based on that model’s own published maximum rather than a fixed number, so this is far less common than it was — but a very large document can still outgrow a small model. The troubleshooting card tells you how many output tokens you actually got. If it is a model with a modest ceiling, switch your Builder using the Change Builder button on the Work screen; the model picker shows each model’s max output and context window so you can pick one with room. Both handle large context windows reliably.
Click Paste Text to select Paste mode. A text editor appears below the buttons — the same line-numbered editor used on the Work screen. Click anywhere inside the editor to place your cursor, then paste your text using Ctrl+V on Windows or Cmd+V on Mac. You can also type directly into the editor.
Use this option when your content comes from a website, an email, a Google Doc, another application, or any source where you can copy and paste text but do not have or do not want to use a file. There is no size limit on pasted text other than your Builder's token capacity.
The editor uses a fixed 80-character-wide column — the same width as the working document on the Work screen. This is intentional and ensures consistent formatting throughout your session.
Click Start from Scratch to select Scratch mode. A confirmation panel appears indicating that WaxFrame will generate the first draft entirely from your project goal. There is nothing else to do in this panel — no file to upload, no text to paste.
In this mode, your project goal is the only context the AIs have. Write it in as much detail as possible before launching. The more specific and complete your goal, the closer the first draft will be to what you actually need.
The small ⓘ button next to the Starting Document heading opens an overlay that explains the three mode buttons and what to do after selecting each one — a quick in-app reference to this section of the manual.
↑ Back to topAt the bottom of each setup screen is a requirements bar showing exactly what is still needed before you can continue or launch. On the Starting Document screen it reads: To launch you need: followed by one indicator:
On the Your Project screen the requirements are: Project name, Version, Document type, Target audience, and Desired outcome — all five must be filled before you can continue to the Starting Document screen.
The Launch WaxFrame → button at the bottom right of the Starting Document screen is inactive until the document requirement is green. Once it is, click Launch WaxFrame → to move to the Work screen and begin your session. WaxFrame saves your project configuration automatically at this point.
The first time you reach the Work screen for a project, WaxFrame nudges you with a 💾 Save a checkpoint? modal. This is the pre-token-burn checkpoint — a free, fast moment to grab a checkpoint of your exact starting state so you can restore it if anything drifts later. The modal offers Checkpoint - Save, Not now, and a Don't ask again for this project checkbox. See Settings → Checkpoint Nudge for the full rules.
↑ Back to top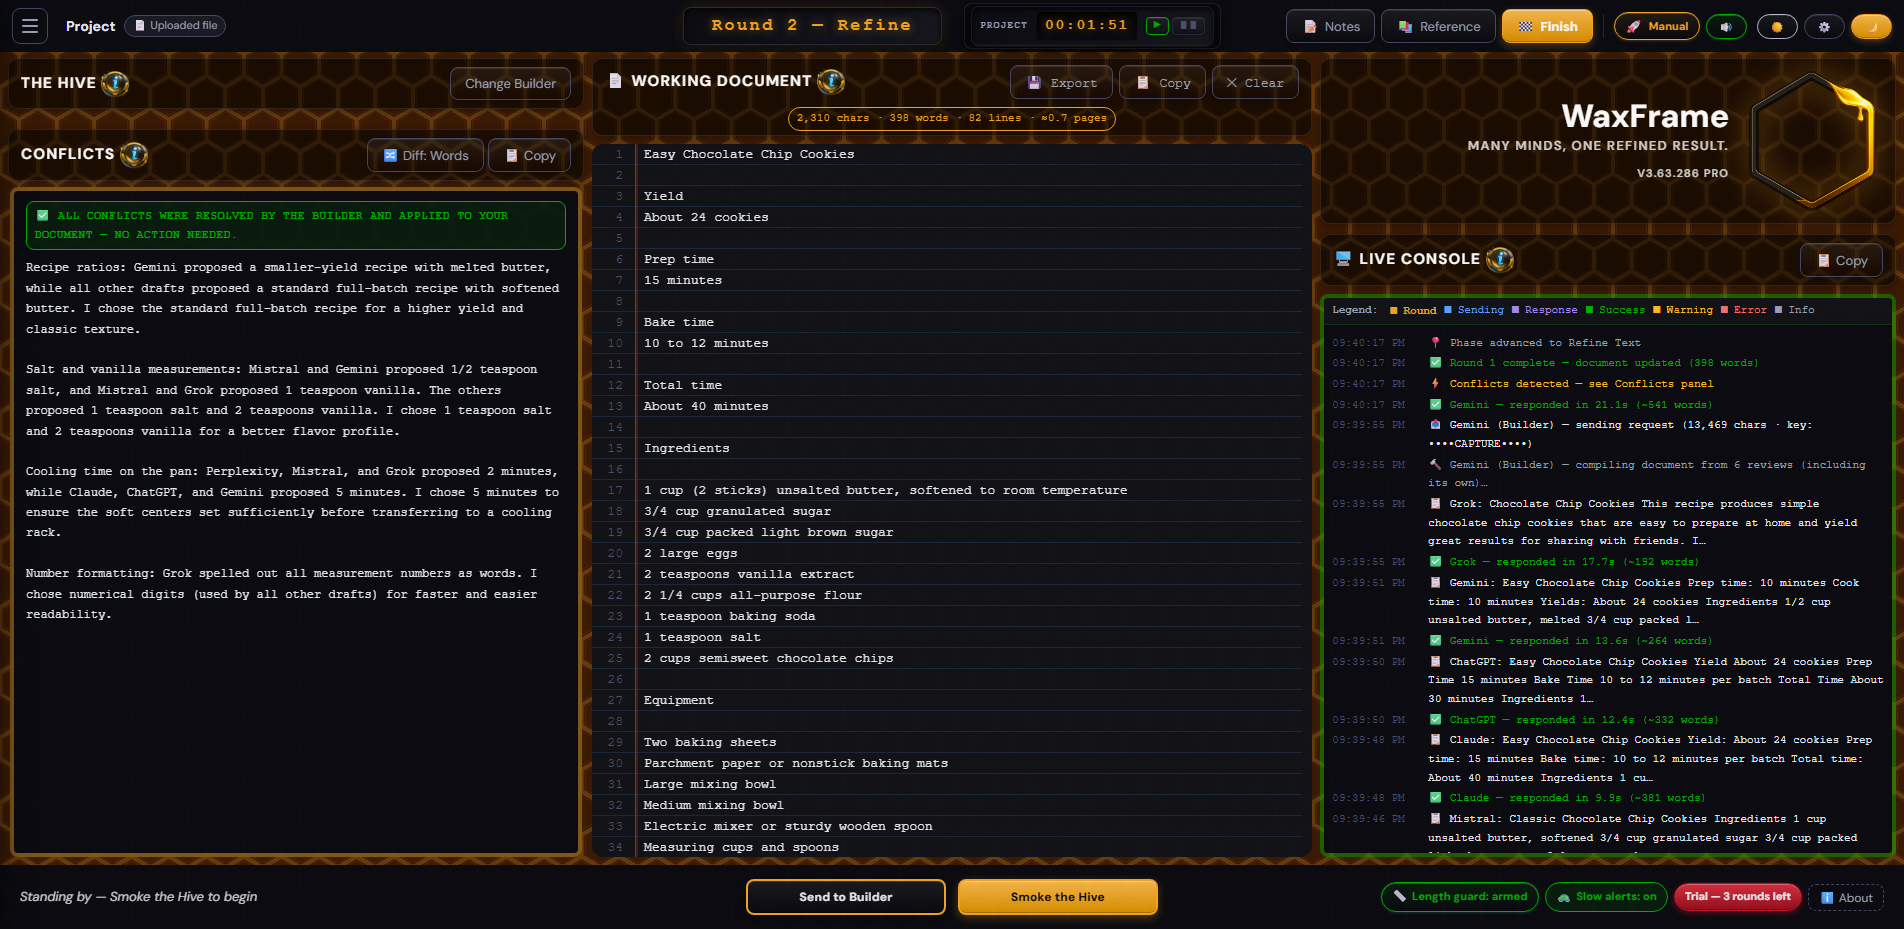
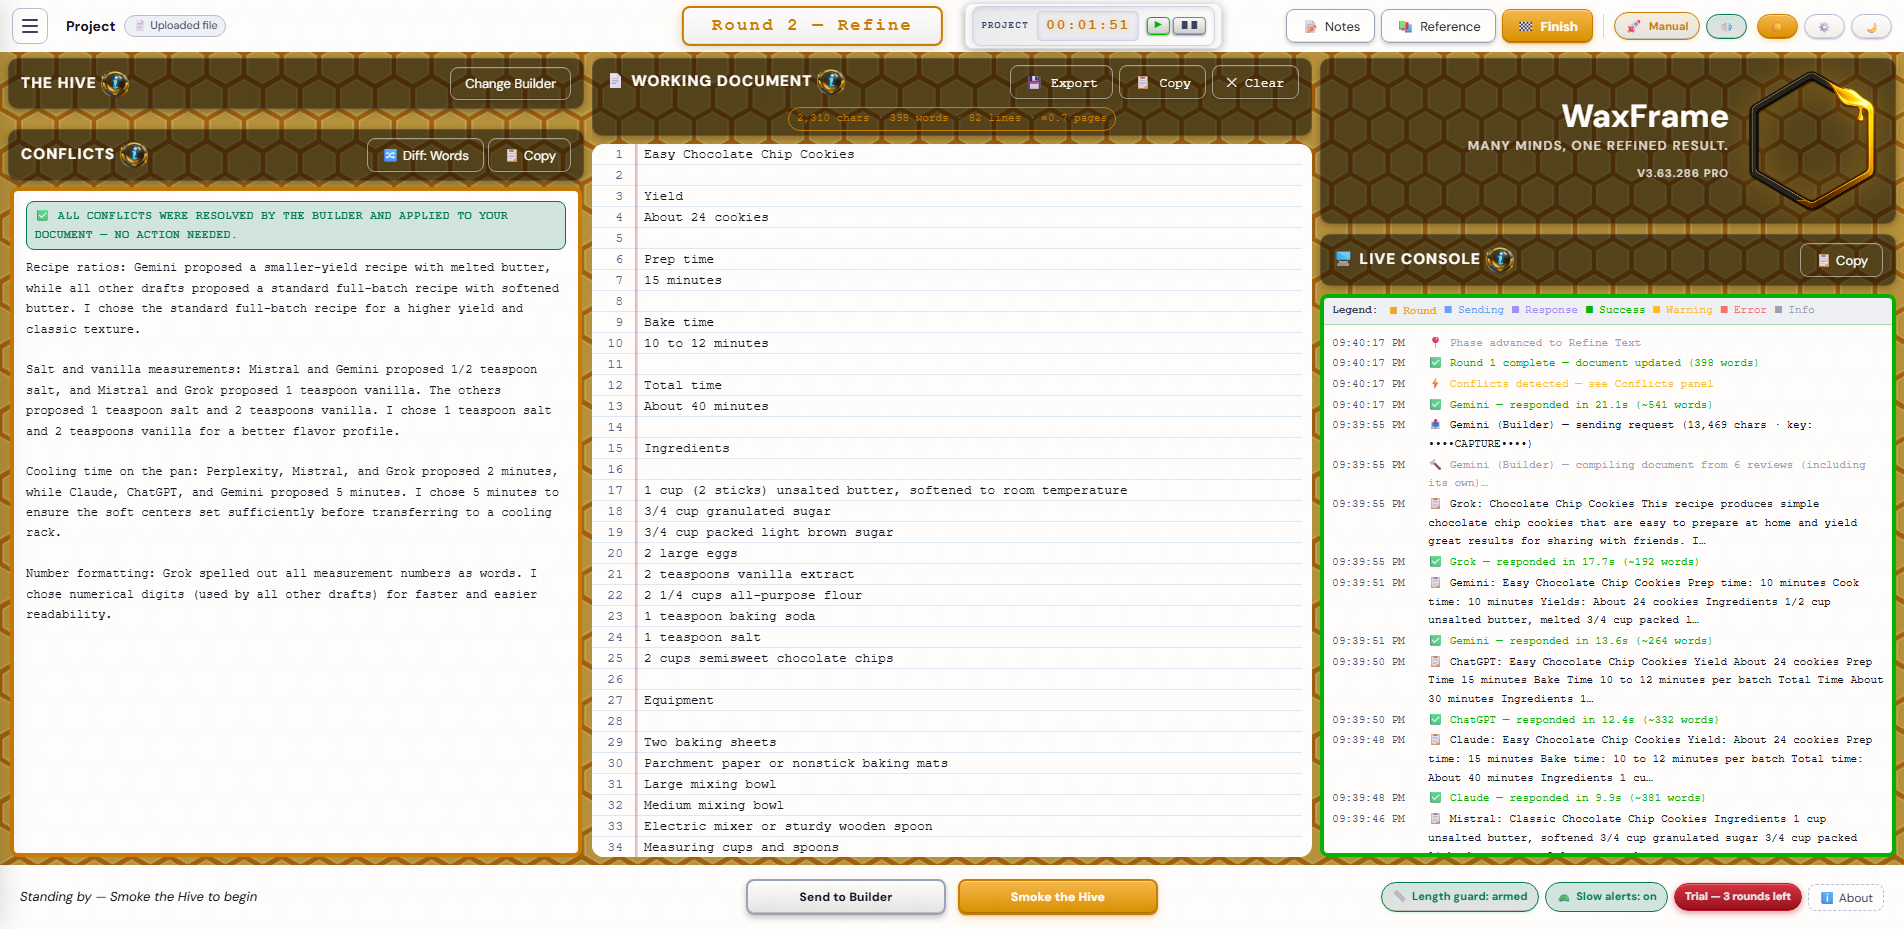
The Work screen is where all rounds happen. It has a top bar, a three-column main area (left panel · Working Document · right panel), and a footer bar at the bottom. Most of the screen's controls are clustered into those four zones. Here is what each contains, top to bottom and left to right.
Running across the very top of the Work screen, three zones — left, centre, right:
Top bar — left zone
Top bar — centre zone
Top bar — right zone (left to right):
Round History is reachable via the Menu (top-left) — covered in detail in Step 10.
The left column contains two sections stacked vertically: The Hive at the top and Conflicts below it.
The Hive section has a small ⓘ info button and two buttons in its header:
Below the header, the AI status area displays differently depending on your screen size:
Below the AI status area is the Conflicts section, also in the left column:
The centre column is headed 📄 Working Document with a small ⓘ info button. This is where your document lives and is updated after each round.
The right column contains three elements stacked vertically: the WaxFrame logo and version stamp, the dual-face clock widget, and the Live Console.
At the very bottom of the Work screen is the footer bar. Three zones — left status, centre actions, right indicators.
Footer — left zone
Footer — centre zone (the two big round-trigger buttons)
Footer — right zone (indicators and info, left to right)
The first time you reach the Work screen for a project, WaxFrame nudges you to save a checkpoint. This is the pre-token-burn checkpoint — a free, fast moment to capture your exact starting state before any AI calls have been made. If anything goes sideways later — a credit hiccup, a drift in the document you want to undo, a new direction you want to try without losing this one — you can restore from this checkpoint and pick up exactly where you started.
A checkpoint is a single JSON file that captures whichever pieces of your WaxFrame state you choose. You don't have to save everything; you pick which sections go in. Same on the restore side — when you bring a checkpoint back, you pick which sections to apply. Unticked sections keep their current local values byte-for-byte.
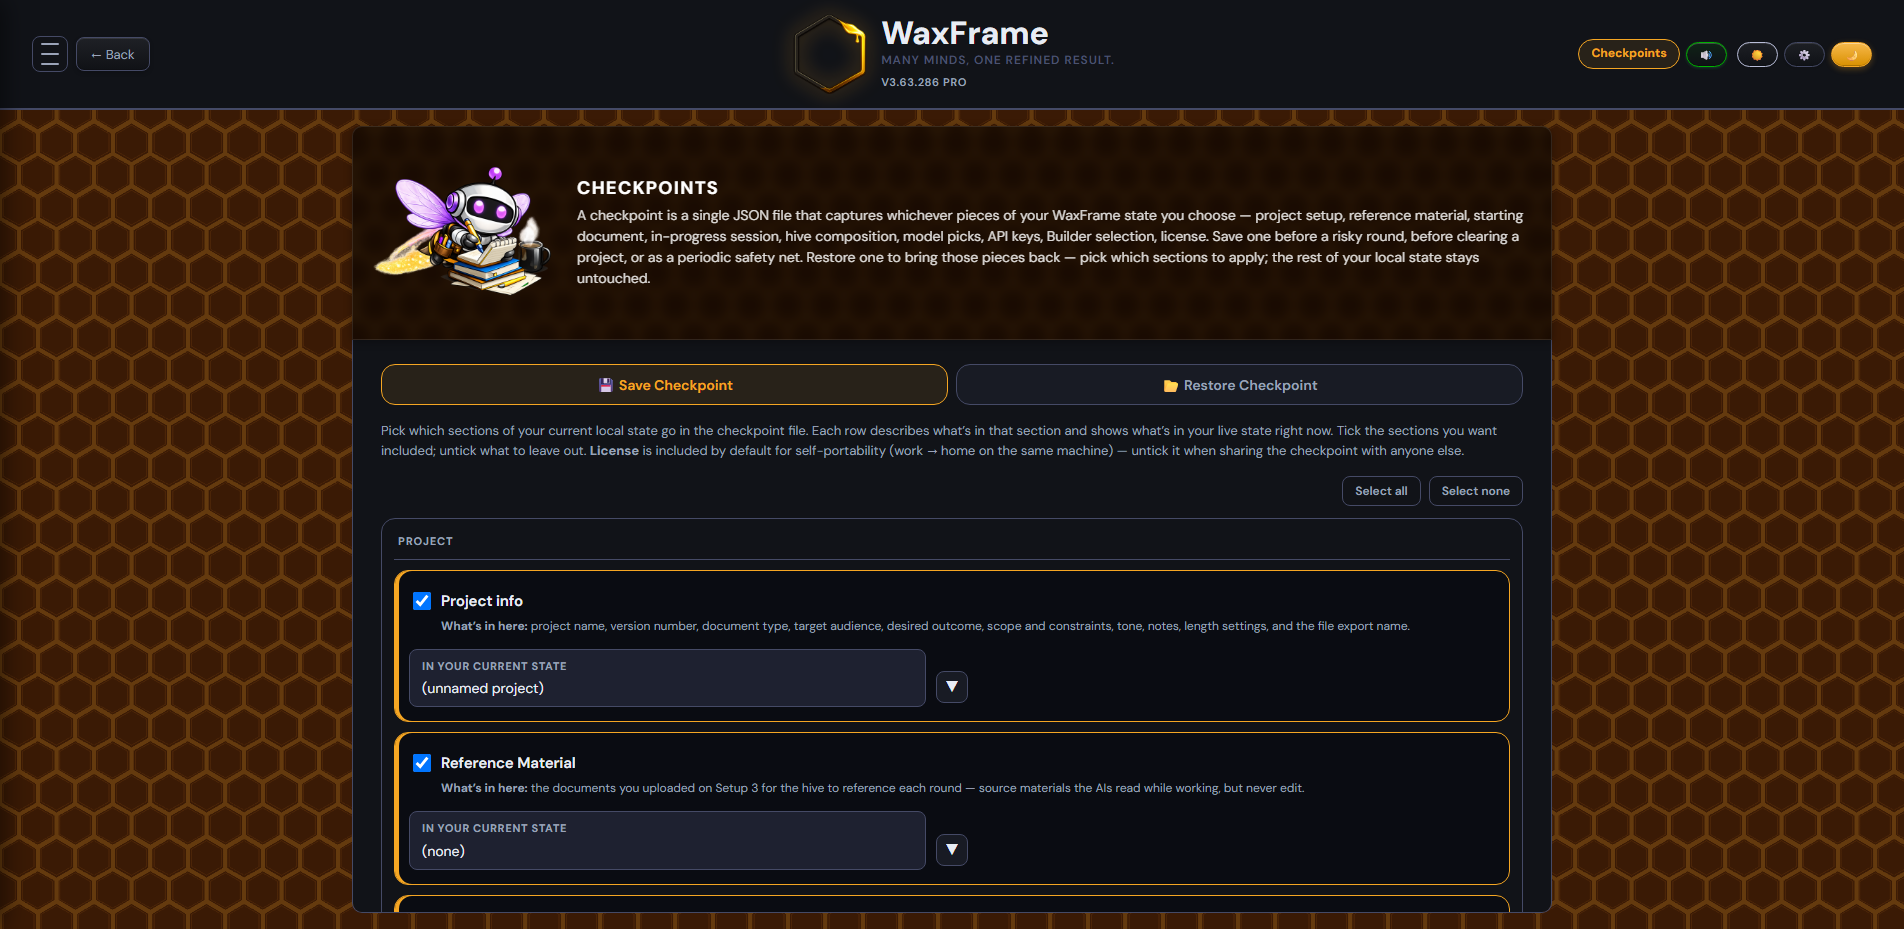
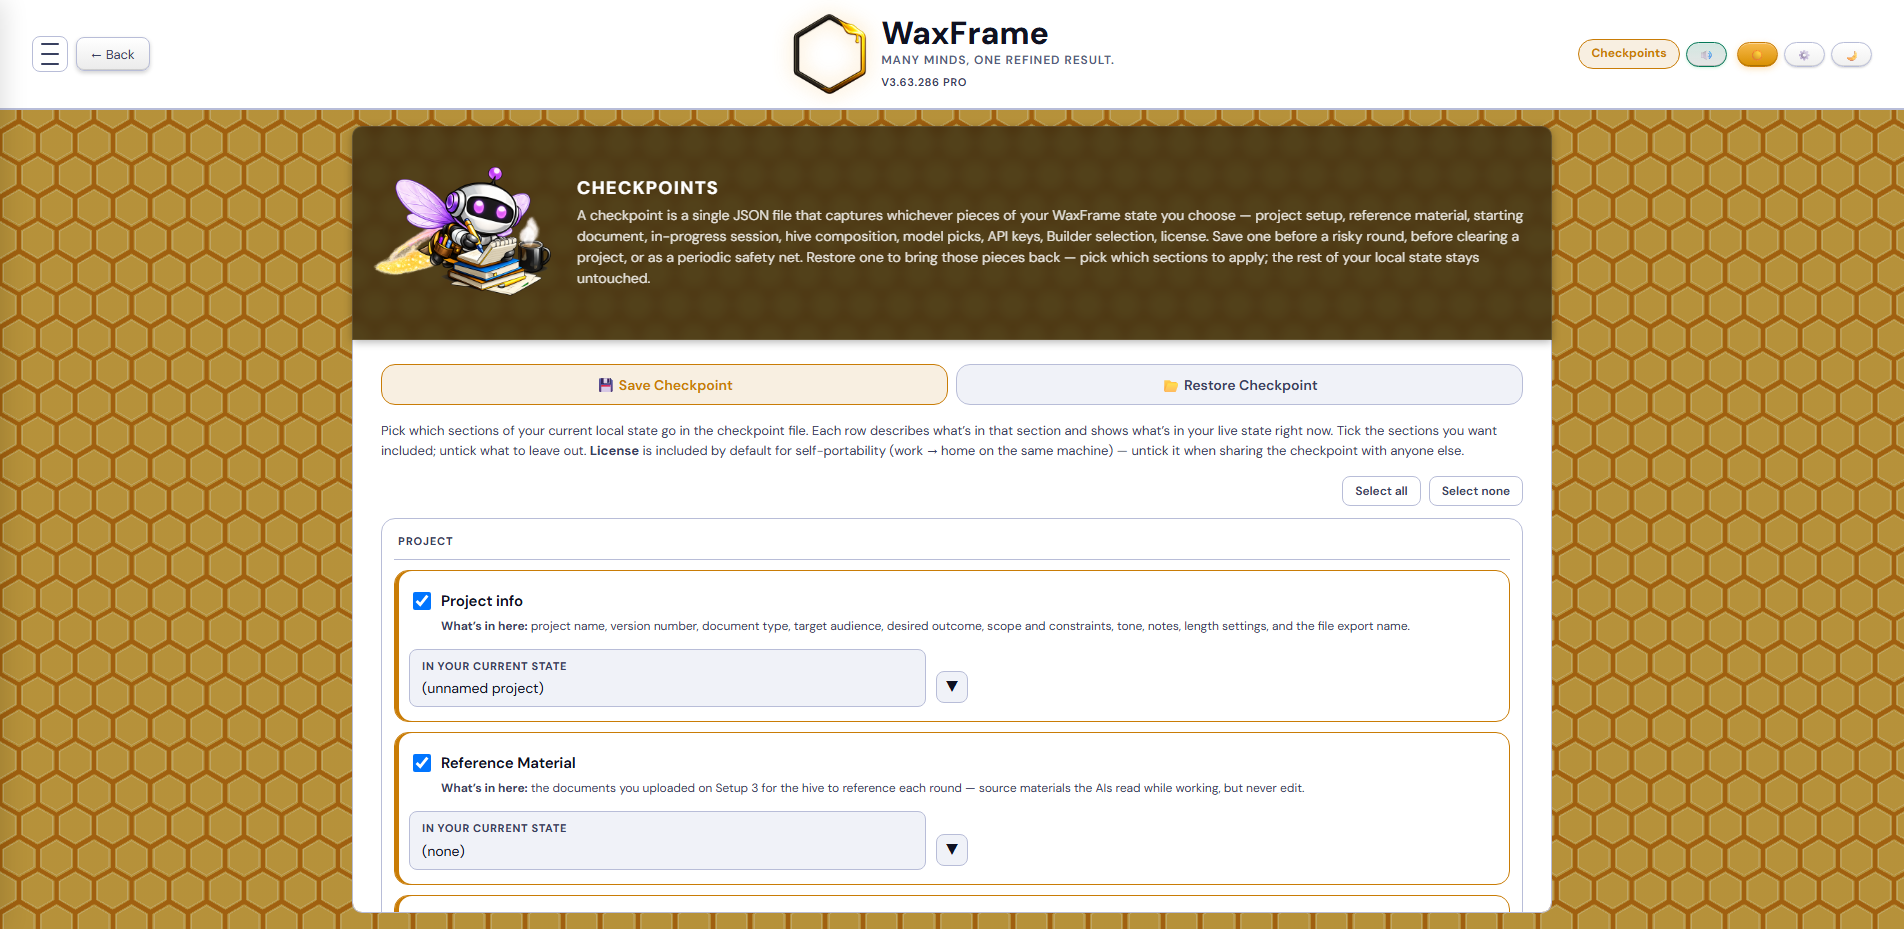
The nudge button takes you to the Checkpoints screen in Save mode. You can also reach this any time from the ☰ menu via 💾 Checkpoint - Save. The screen lists nine sections you can independently include or exclude. Each row tells you what's in the section and shows what's in your live state right now.
Project group — three rows:
Session group — one row:
Hive group — four rows, each independently tickable. There's no parent/child gating; you can include just keys, or just the AI list, or any combination:
License group — one row:
Tick what you want included, then click 💾 Save Checkpoint. The file downloads with a name like {project}-{version}-WaxFrame-Checkpoint-{date}.json. Store it somewhere private — even with API keys and license unticked, a checkpoint can contain your document text and AI responses.
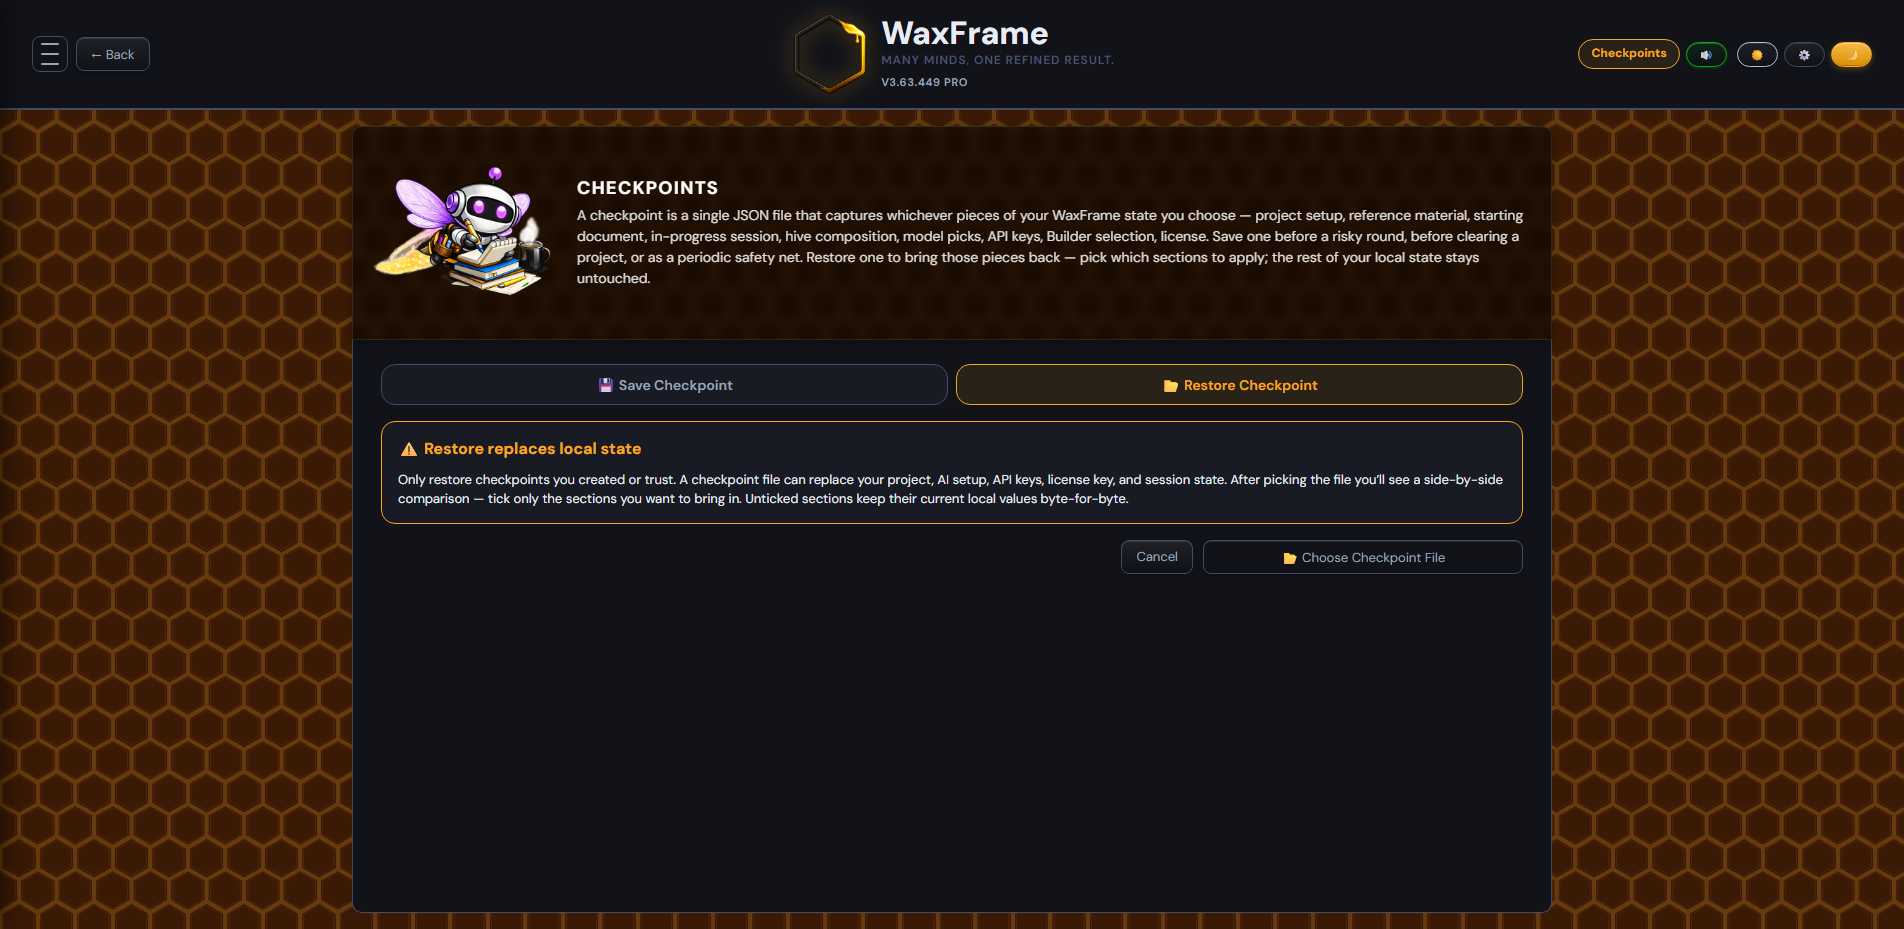
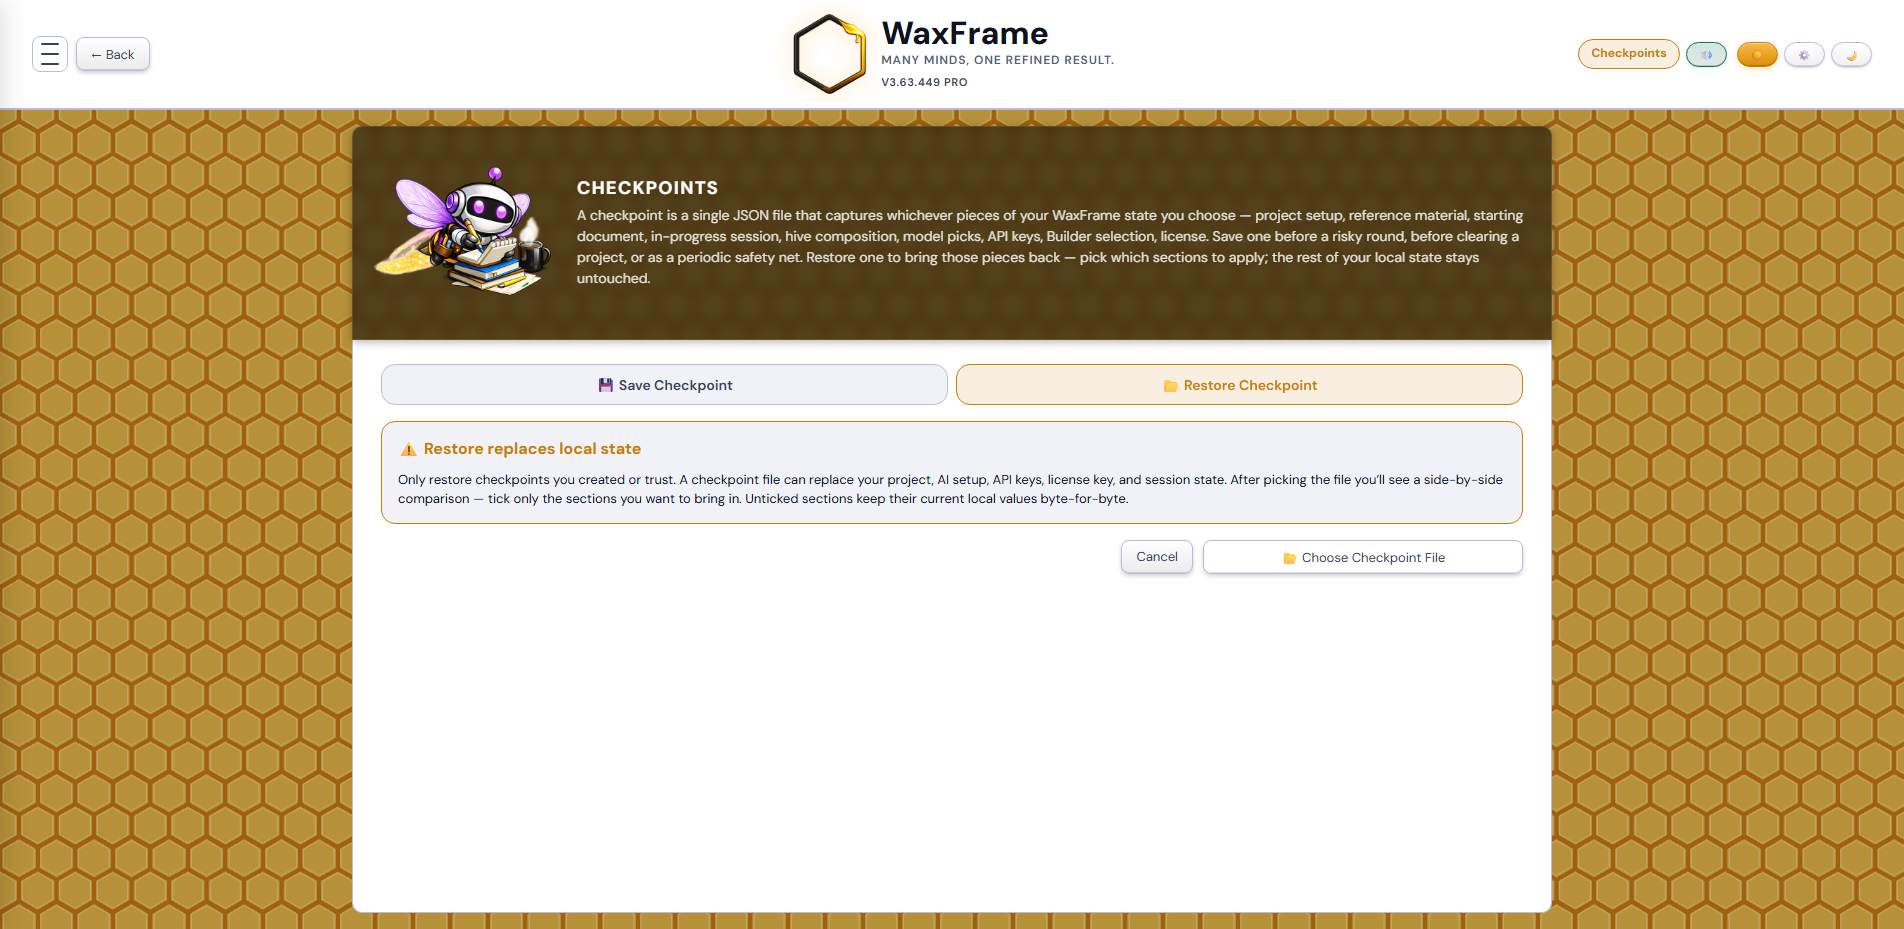
From the ☰ menu, 📂 Checkpoint - Restore opens the same screen in Restore mode. After the trust warning, click 📂 Choose Checkpoint File and pick the JSON. The screen swaps to a side-by-side comparison with the same nine sections — each row shows what's in your current local state and what's in this checkpoint file, side by side, so you see exactly what each ticked section would replace.
Defaults are conservative: project sub-sections and session are pre-ticked when the file carries them; everything hive-related is unticked by default (you usually keep your local hive); license is unticked by default (you don't re-import a license you already have locally). Tick what you want to bring forward, untick what to keep local. Click 🔄 Restore Selected and the page reloads with the merged state.
Sections the file doesn't carry are shown but disabled, with a label that says (not in checkpoint) in the comparison column — so the missing rows are explicit rather than mysterious.
For a checkpoint nudge that's silenced per-project, see Settings → Checkpoint Nudge.
Click the Smoke the Hive button in the footer bar to start a round. All your active reviewer AIs begin processing simultaneously — having more AIs does not make the round take longer, since they all run at the same time. You can watch each AI's progress in the Hive panel on the left — each icon animates as its AI works.
Do not close the browser tab or navigate away while a round is running. If the round is interrupted, the document will not be updated and the round will not be saved to history, though your API call tokens will still have been consumed.
WaxFrame decides how to use your goal based on one simple question: does a document exist? You do not choose or configure this — it is handled automatically.
After a round completes, the centre column shows the updated document. Read it carefully before running another round. Each version is saved automatically to the Round History — open the Menu and click ⏱ Round History to access any previous version and restore it if needed.
A conflict appears in the left column when your AIs gave the Builder genuinely incompatible suggestions — recommendations that point in different directions strongly enough that the Builder flagged the decision for you rather than choosing arbitrarily. Common scenarios: one AI suggested removing a section while another suggested expanding it; reviewers proposed different conclusions; AIs disagreed on tone, phrasing, or structure for a key passage.
Conflicts are not a sign something went wrong. They are a signal that your AIs found a real decision point — one that genuinely depends on your intent and cannot be resolved by the AI alone. When you see conflicts, the hive is working correctly.
Each conflict card shows:
Read the current text in context, read each option, and click the one that best matches your intent. Once you have selected every conflict, click Apply Decisions to update the document. Resolved conflicts are locked — WaxFrame tells the Builder about your decisions in future rounds and instructs it not to re-raise them.
This happens. Some AIs — particularly those running under a proxy or enterprise gateway — do not consistently carry resolution instructions into the next round. The conflict card disappears, but the next round produces the same issue. Here is what to do, in order:
Step 1 — Reinforce it in Notes. Before the next round, open the Notes drawer and write the resolution explicitly. Do not paraphrase — quote the exact text you want locked:
"This line is final and must not be changed under any circumstances: "The recommended solution is a cloud-managed architecture." Do not re-raise this as a conflict. Do not offer alternatives."
The Notes drawer has a 🔒 Lock a line template button that pre-fills this format for you. Paste the exact text into the placeholder and run the round.
Step 2 — Add it to your Project Goal. If the same issue returns after two rounds of Notes reinforcement, it means the AI is not reading the resolution at all — it needs the instruction in the permanent brief. Open the Project screen via the Menu, add the constraint to Additional instructions, and return to the Work screen. The goal is sent every round; Notes are cleared after each round.
Step 3 — Remove the offending AI. If one specific AI keeps re-raising a resolved conflict after both Notes and goal reinforcement, it is not reading your instructions. Use Edit Hive (laptop) or toggle its card directly (desktop) to remove it from the session. The hive will converge faster without it.
When quoting text to lock it, use the exact words from the document — not a paraphrase. The Builder pattern-matches against what it sees in the document. A near-match may not trigger the lock.
No conflicts does not always mean convergence — it can mean the AIs are making changes that do not produce disagreement, or that the Builder is silently overriding suggestions. If the document is drifting in a direction you do not want but no conflicts are flagged, use Notes to give the Builder explicit direction: what to fix, what to leave alone, and what the next round must accomplish. Then run the round and check the console to see which AIs responded and what they said.
Rather than treating conflicts as a problem to dismiss quickly, use them as a tool. They surface real decisions about the document's direction — questions about emphasis, tone, structure, or argument that you will need to answer to get the document where you want it. Each resolution tells the entire hive which direction to take. A well-resolved conflict round is often the most productive round in a session.
Two kinds of convergence: unanimous and majority. WaxFrame stops the hive automatically when one of these fires:
Unanimous means every reviewer in the hive marked the round as "no changes needed." Full agreement — the document is done by all of them. This is the strongest stopping signal.
Majority means more than half the reviewers marked the round clean, but at least one holdout is still suggesting changes. The Builder stops here because there is no productive direction left — the holdouts' suggestions are typically nice-to-haves that the majority view as fine-as-is. The document is shippable; you can review the holdout suggestions and either incorporate selected ones via Notes or just finish.
Neither convergence type means the document is "perfect." It means the hive has converged on what they think is shippable. If you want stronger output beyond that, the right move is usually to inject targeted Notes (e.g., "tighten the third paragraph" or "the closing line is too long") and run another round — not to keep waiting for a state that may never come.
After your first round, the process repeats: click Smoke the Hive, wait for the round to complete, read the updated document, resolve any conflicts, make any direct edits you want, and decide whether to run another round. Most documents reach a high quality in three to five rounds. Some need more; some need fewer. The right time to stop is when the document reads the way you want it to.
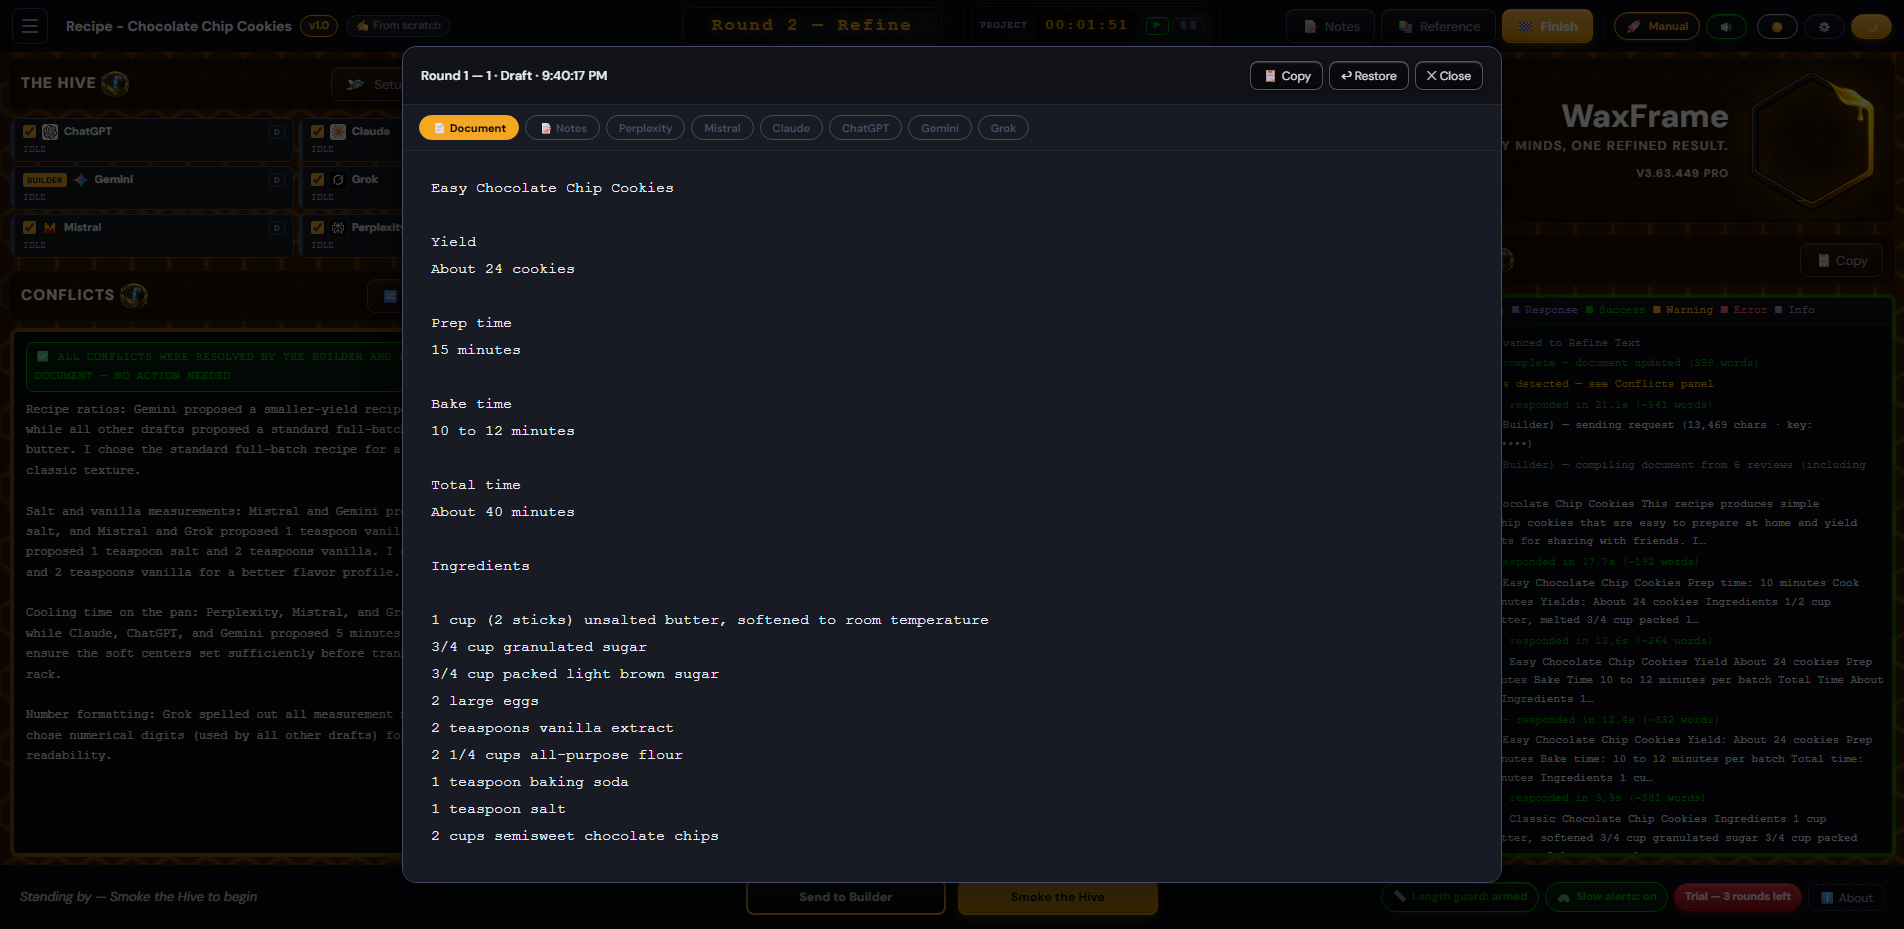
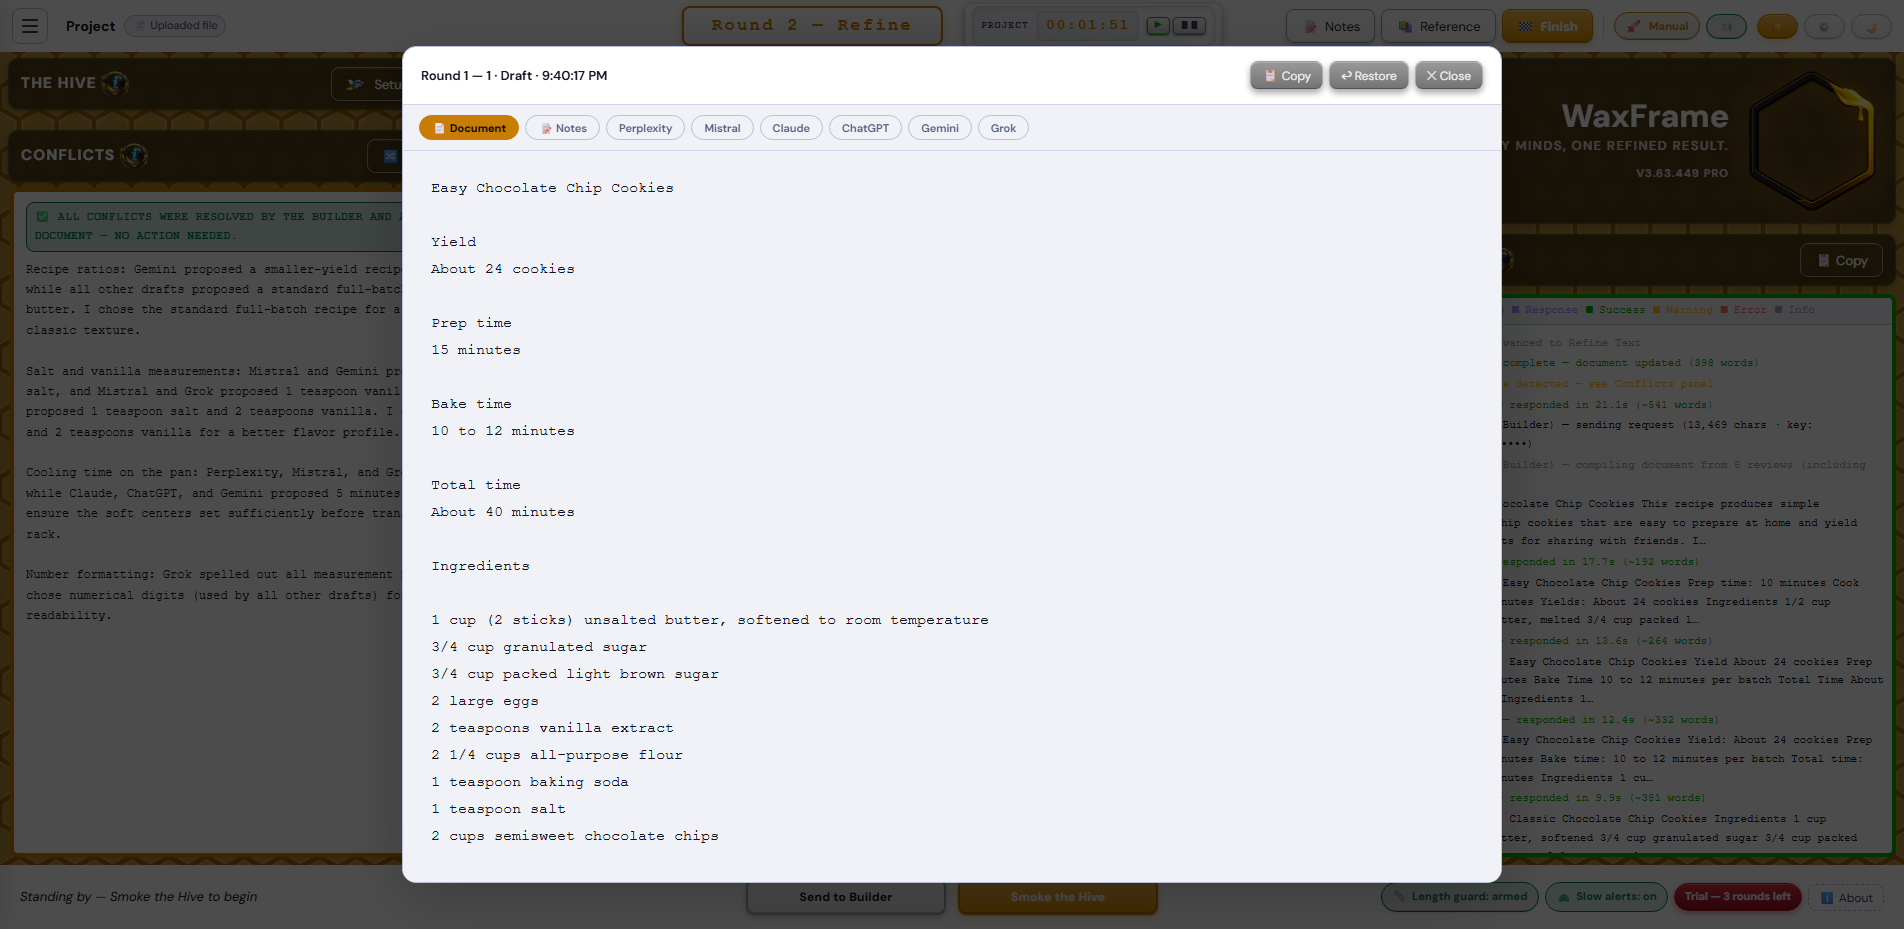
Open the Menu and click ⏱ Round History to see every version of the document saved so far, newest first, including the Original pre-Round-1 state. Each entry shows a badge for the round number, the phase label and timestamp it was saved at, and a word count plus reviewer response count. A round that was rejected (bloated output, malformed structure, an API error) shows as Failed instead, with the reason — the document was left unchanged and the attempt is kept for reference, not silently dropped.
Two buttons sit on each entry: View Doc opens a modal with that round's full document snapshot alongside tabs for each reviewer's response from that round, and ↩ Restore replaces your current working document with that version (add a Note afterward telling the Builder you reverted, so the next round doesn't fight the older text).
Every reviewer is constrained to its top three most impactful suggestions per round. This keeps responses focused and prevents long lists of trivial nitpicks. On a small document this is plenty of coverage. On a long or complex document, six reviewers picking three issues each only adds up to eighteen specific spots — and they do not always pick the same spots.
The practical effect: one round may concentrate every reviewer on the opening section, the next round may scatter them across the middle, and a third round may surface things in the conclusion that nobody flagged before. A round can complete with zero conflicts not because the document is finished, but because the reviewers happened to focus on different parts and none of their suggestions overlapped enough to disagree about.
This is how prioritised review works, not a bug. The real "done" signal is not "no conflicts in the last round" — it is a round where every reviewer responds with NO CHANGES NEEDED. Until you reach that, keep running rounds. On a big document, expect to run more rounds than you would on a small one, and expect the focus to move around between them. That is the system covering ground three issues at a time.
Click 📝 Notes in the top bar to open the Notes drawer. This is where you write direct instructions for the Builder for the next round only. Notes are not sent to reviewers — only the Builder receives them. They are cleared automatically after each round so they do not carry over unintentionally.
Use Notes when you want something specific to happen in the next round that your goal alone would not produce — a targeted fix, a section to protect, a direction to push toward.
The Notes drawer has a row of template buttons that pre-fill common instructions for you. Click one and the textarea fills with a ready-made instruction — the placeholder text is automatically selected so you can type your replacement immediately.
Notes work best when they are specific and direct. The Builder reads them as instruction, not suggestion.
| Situation | What to write in Notes |
|---|---|
| Tighten a section | "The executive summary is too long. Rewrite it so it is no more than three sentences." |
| Remove something specific | "Remove the third paragraph in the Cost section — it repeats what was already said in paragraph one." |
| Strengthen a weak part | "The conclusion is weak and non-committal. Rewrite it to be decisive and action-oriented." |
| Lock a line | "This line is final — do not change it: "The recommended solution is a cloud-managed architecture."" |
| Lock a section | "Do not change anything in the Technical Specifications section. The section begins with: "The proposed system consists of…"" |
| Block new content | "Do not add any new sections or headings. Work only with the existing structure." |
| After reverting the document | "I have reverted the document to a previous version. Ignore any changes from the previous round and work from what is here now." |
If the Builder or reviewers keep modifying a line you need to preserve — a specific metric, a name, a legal phrase, a date — quote the exact text in your Notes instruction. Do not paraphrase it. The Builder pattern-matches against what it sees in the document and needs the exact wording to recognise what you are protecting.
Use the 🔒 Lock a line template button in the Notes drawer. It pre-fills:
"Lock this line exactly as written — do not change it: "[PASTE THE EXACT LINE HERE]""
Replace the placeholder with the exact text from your document — copy and paste it directly. Then run the round. If the issue persists after two rounds of this, add the same instruction to your Additional instructions goal field so it is sent permanently, not just for one round.
The Notes field is cleared after every round. If a constraint needs to survive every round permanently, put it in Additional instructions on the Project screen — not in Notes.
The Working Document editor is fully editable at any time between rounds. If you can see exactly what needs to change — remove a paragraph, fix a factual error, rewrite a heading — just do it directly. The AIs will work with whatever is in the editor when the next round starts. If you remove something intentionally and want to make sure the AIs do not reintroduce it, add a Note: "I have removed [X] — do not reintroduce it."
On desktop screens, toggle individual AIs directly on their cards in the Hive panel. On laptop screens, click Edit Hive in the Hive header to open the toggle modal. Click Change Builder to switch which AI is doing the writing. Neither action requires going back to Setup or losing your current session. Both take effect on the next round you run.
When you have made direct edits to the document and want the Builder to integrate and clean them up — without running a full reviewer cycle — click Send to Builder in the footer bar instead of Smoke the Hive. The Builder rewrites the document based on your current version and your Notes (if any), but the reviewers do not run. This saves time and tokens when you already know what direction to take and just need the Builder to execute it cleanly.
Watch for these signals that the document is ready:
Running more rounds past this point produces diminishing returns. When the document reads the way you want it to, stop and export.
↑ Back to topClick the 🏁 Finish button in the top right of the Work screen to open the Finish panel. A modal dialog appears titled 🏁 Project Complete! with four buttons and two secondary options at the bottom.
⚠️ Export before you start a new project. Clicking Start New Project permanently clears your working document and round history. There is no way to recover them. Always use 💾 Export Document before clicking Start New Project if there is any chance you will want this session's content again. If you want to be able to resume the full session later — with all rounds, conflicts, and working document intact — use Menu → 💾 Checkpoint - Save first.
The goal fields on Setup 2 aren't optional decoration. Reviewers can only judge whether a document fits the goal if the goal is clearly stated, and the more specifically you state it, the faster the hive converges.
A curated set of measured runs that illustrate patterns. Full data lives in docs/WaxFrame_Playbook_Test_Master.txt. The point of these isn't completeness — it's to show how setup specificity, hive size, and scaffold quality drive convergence rounds.
Three patterns repeat across these runs.
1. Setup specificity drives convergence. The structured goal fields — audience, outcome, scope, tone — pay back as rounds you don't have to run. The minutes you spend on the Project screen save you minutes on the work screen, and usually more than break even.
2. Three or more AIs converges faster than two. When two reviewers disagree on a specific change, the run pauses and asks you to break the tie; with three or more reviewers, disagreements resolve automatically by majority and the run keeps moving. The cost is one more reviewer per round; the win is fewer interruptions and noticeably faster wall-clock — the Brightwater data above is the clearest example.
3. Reference Material is high-leverage. When the hive needs a body of facts to draw from (an identity scaffold, a job description, a research brief, a source recipe), pasting that into Setup 3 — Reference Material delivers more value per character than expanding the goal fields. The hive pulls from it on every round; you only have to type it once. Demonstrated in the Recipe (Publix-style Southern potato salad) test: a 2,636-character reference recipe paired with an empty Starting Document and a fully-populated Project scaffold converged in 4 rounds, well below the 5–20+ range estimated for traditional recipe refinement. When the source recipe instead sits in the Starting Document, the hive treats it as a draft to fight; when it's in Reference Material, the hive builds fresh from the scaffold. Same source content, very different convergence shape.
If your hive is struggling to converge after Round 3 or 4, open the Project screen and read your goal fields aloud — would a reviewer know what success looks like from those words alone? If not, expand them. Then check whether you should be using Reference Material instead of cramming everything into Scope.
↑ Back to topWhen a starting document is misaligned with the goal you've defined, the hive can spend many rounds dragging it toward what was actually wanted. Sometimes the faster path is to discard the draft entirely and let the hive build from scratch using only the goal fields.
A Thank-You note converged in 2 rounds when started from scratch (Start from Scratch button on Setup 4, empty starting document) versus 13 rounds when refining a rough draft pulled from a pre-existing template. Same final document type, same hive, same goal fields. The only variable was whether the run started with a 0-character document or a misaligned draft. The misaligned draft cost roughly 6× more rounds.
This isn't a universal rule. When your starting draft is already well-aligned with the goal — your existing résumé that just needs polish, an article draft you're happy with the bones of — refining is faster than starting over. The decision point: does the starting document already reflect the goal, or is it a different goal that needs reshaping? If the latter, scratch usually wins.
↑ Back to topThe Builder does heavier synthesis work than reviewers — it accepts, rejects, and integrates change proposals across the hive every round, and the reviewers then judge its output. The Builder is also usually a reviewer itself, which means its synthesis style is being judged against its own preferences as well as the other reviewers'.
A Builder mismatched to the document type tends to invite more reviewer dissent, which extends convergence. We don't yet have systematic measured data comparing specific Builders across document types — as more runs are measured, this section will be updated with concrete recommendations.
If you've run two or three rounds where reviewers keep flagging the same kinds of issues, and the Builder's output keeps drifting away from the goal in a consistent direction, try changing the Builder on the Set up your hive screen and re-run. The hive's convergence behavior often shifts immediately when the Builder is better matched.
↑ Back to top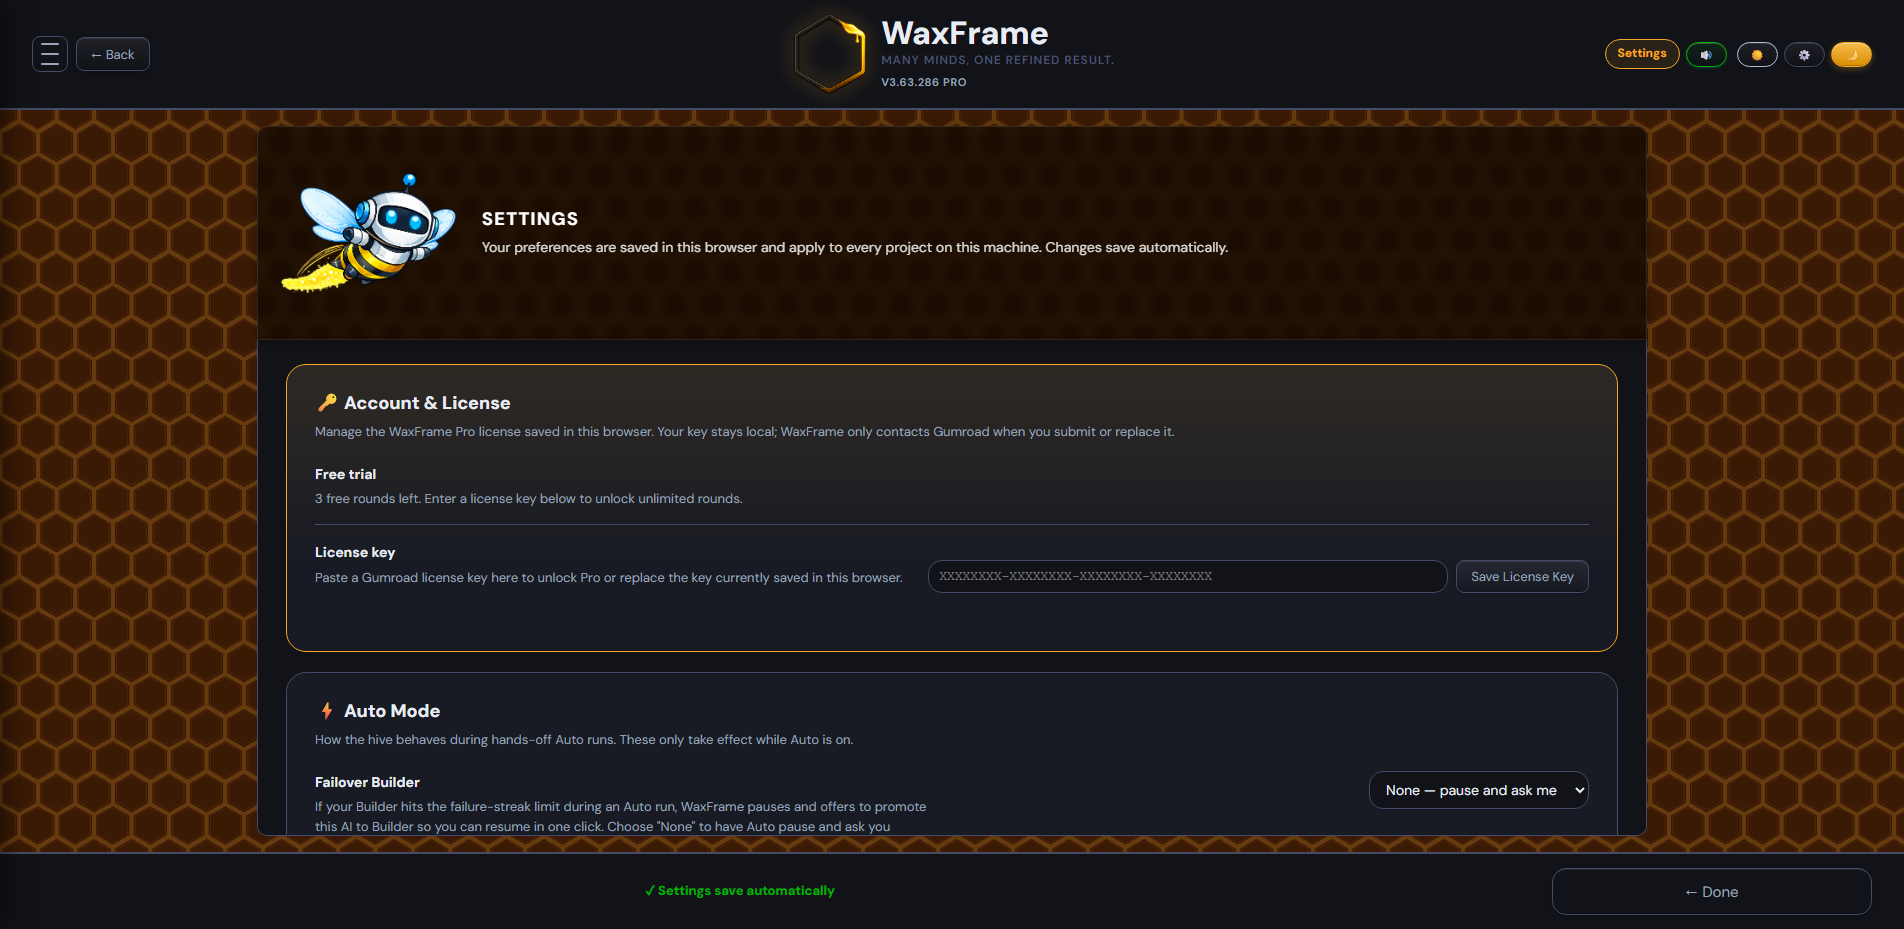
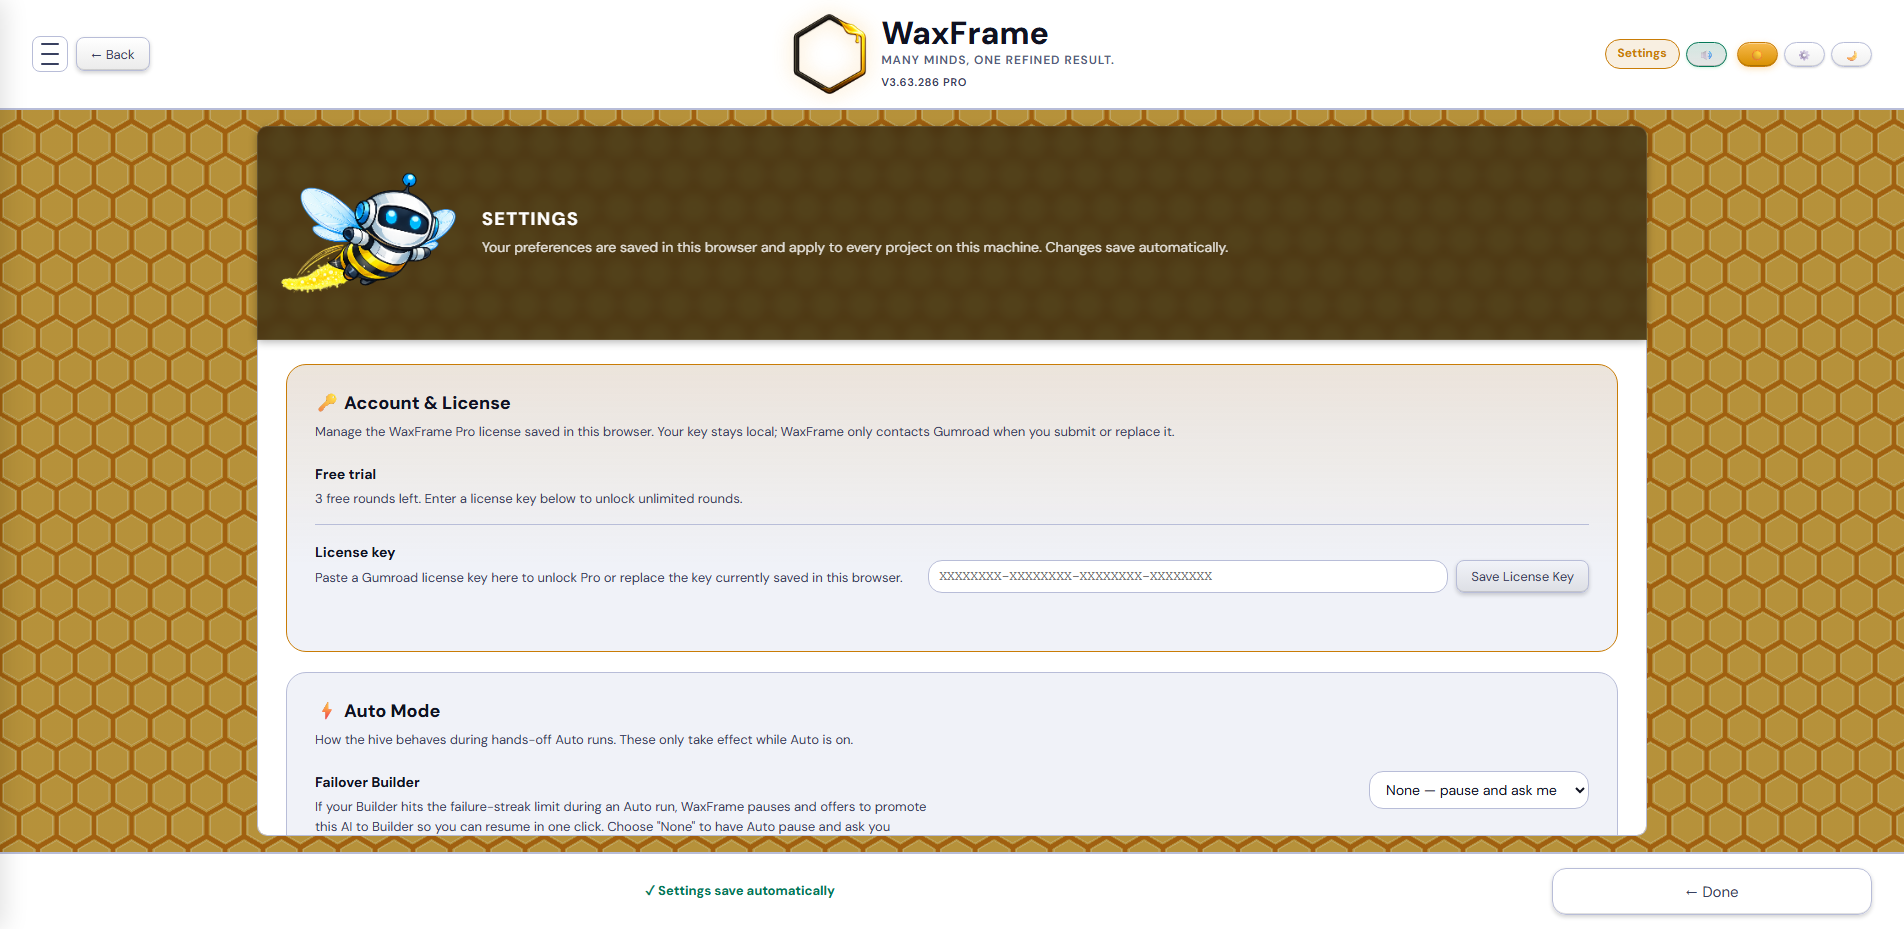
The first Settings section shows your current license state and handles normal license management. If you are on the free trial, it shows how many rounds remain and provides a field for your Gumroad license key. If WaxFrame Pro is active, it shows a masked copy of the saved key and lets you replace or remove it. The key is stored locally in this browser; WaxFrame contacts Gumroad only when you submit or replace a key.
Everything on the Settings screen is a per-machine preference saved in your browser's localStorage. They are global across projects — they are not part of a project checkpoint file, and they do not transfer when you restore a checkpoint on a different machine. The only exception is the Length Guard toggle, which mirrors the work-screen footer pill and is therefore project-scoped (it resets when you start a new project).
How the hive behaves during hands-off Auto runs. These only take effect while Auto is on; they have no effect when running in Manual mode.
Which AI reads text out of scanned or garbled PDFs — used by the "Re-extract with AI Vision" button on the work screen and the automatic vision pass on image-only pages.
Mirror toggles for the work-screen footer pills, plus background model-list refresh and a reset path for dismissed informational confirmations.
Some confirmation modals in WaxFrame are informational — they explain a consequence rather than gating a destructive action. After you have seen the explanation a few times, the modal is just nag. Those modals carry a Don't show this again checkbox; tick it and confirm the action, and that modal will never appear again on this browser.
Modals that carry the checkbox:
Intentionally NOT dismissable (security/safety brakes — these fire every time): the Checkpoint - Restore warning (restoring a checkpoint can replace your whole project, AI setup, API keys, and session — a trust decision that must be made each time), plus destructive confirms like Remove API Key, Clear Project, Clear Working Document, and Remove Custom AIs.
How dismissal persists:
Modals that do NOT carry the checkbox (by design): destructive confirms — Remove API Key, Clear Project, Clear All Reference Material, Remove N Custom AIs, Clear Working Document, and similar. These exist as a safety brake on an irreversible action; silencing them would be a footgun. If you find yourself wishing one of these were silenceable, the answer is almost always "you do not actually want to silence it."
The first time you reach the work screen for a project — right after finishing the 4 setup screens and clicking Smoke the Hive — WaxFrame nudges you to save a checkpoint before you burn any tokens. The checkpoint captures your hive setup, project goal, reference material, and starting document, so if anything goes sideways during the run (a credit hiccup, an unexpected drift in the document, or a new direction you want to try without losing this one) you can restore the exact starting state.
This modal carries a Don't ask again for this project checkbox, but the semantics are a little different from the informational confirms above:
The per-project key is derived from your project name and version. Renaming the project resets the suppression — treat that as a feature rather than a bug. Clicking ↺ Reset suppressed prompts in the Settings panel also clears all checkpoint-nudge dismissals along with the other informational confirms.
The six default AIs (ChatGPT, Claude, Gemini, Grok, Perplexity, Mistral) cover the most widely-used public AI providers. Use Add Custom AI when you want to connect an AI that is not in that default list — for example, Together AI, Cohere, DeepSeek, Ollama running locally on your machine, LM Studio, or any other AI service that exposes an API endpoint accepting chat completion requests in OpenAI-compatible, Anthropic, or Google format.
To open the form: go to the Setup screen and click Add Custom AI in the toolbar above the Worker Bees list.
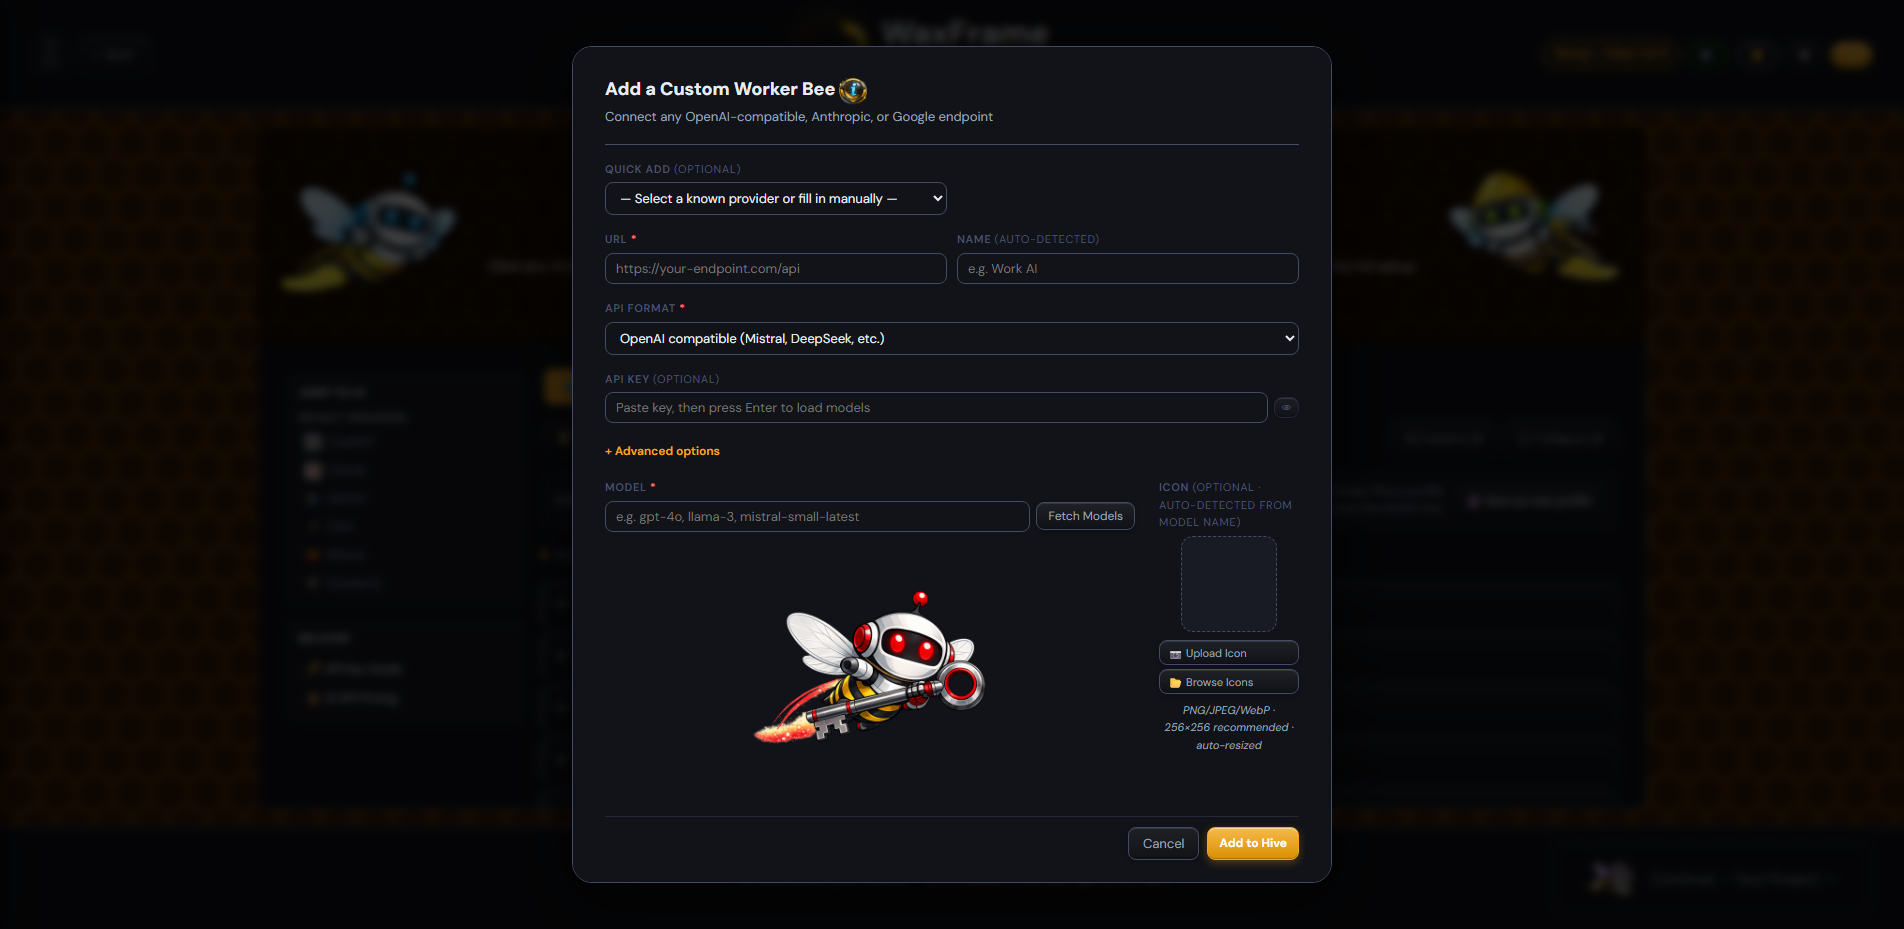
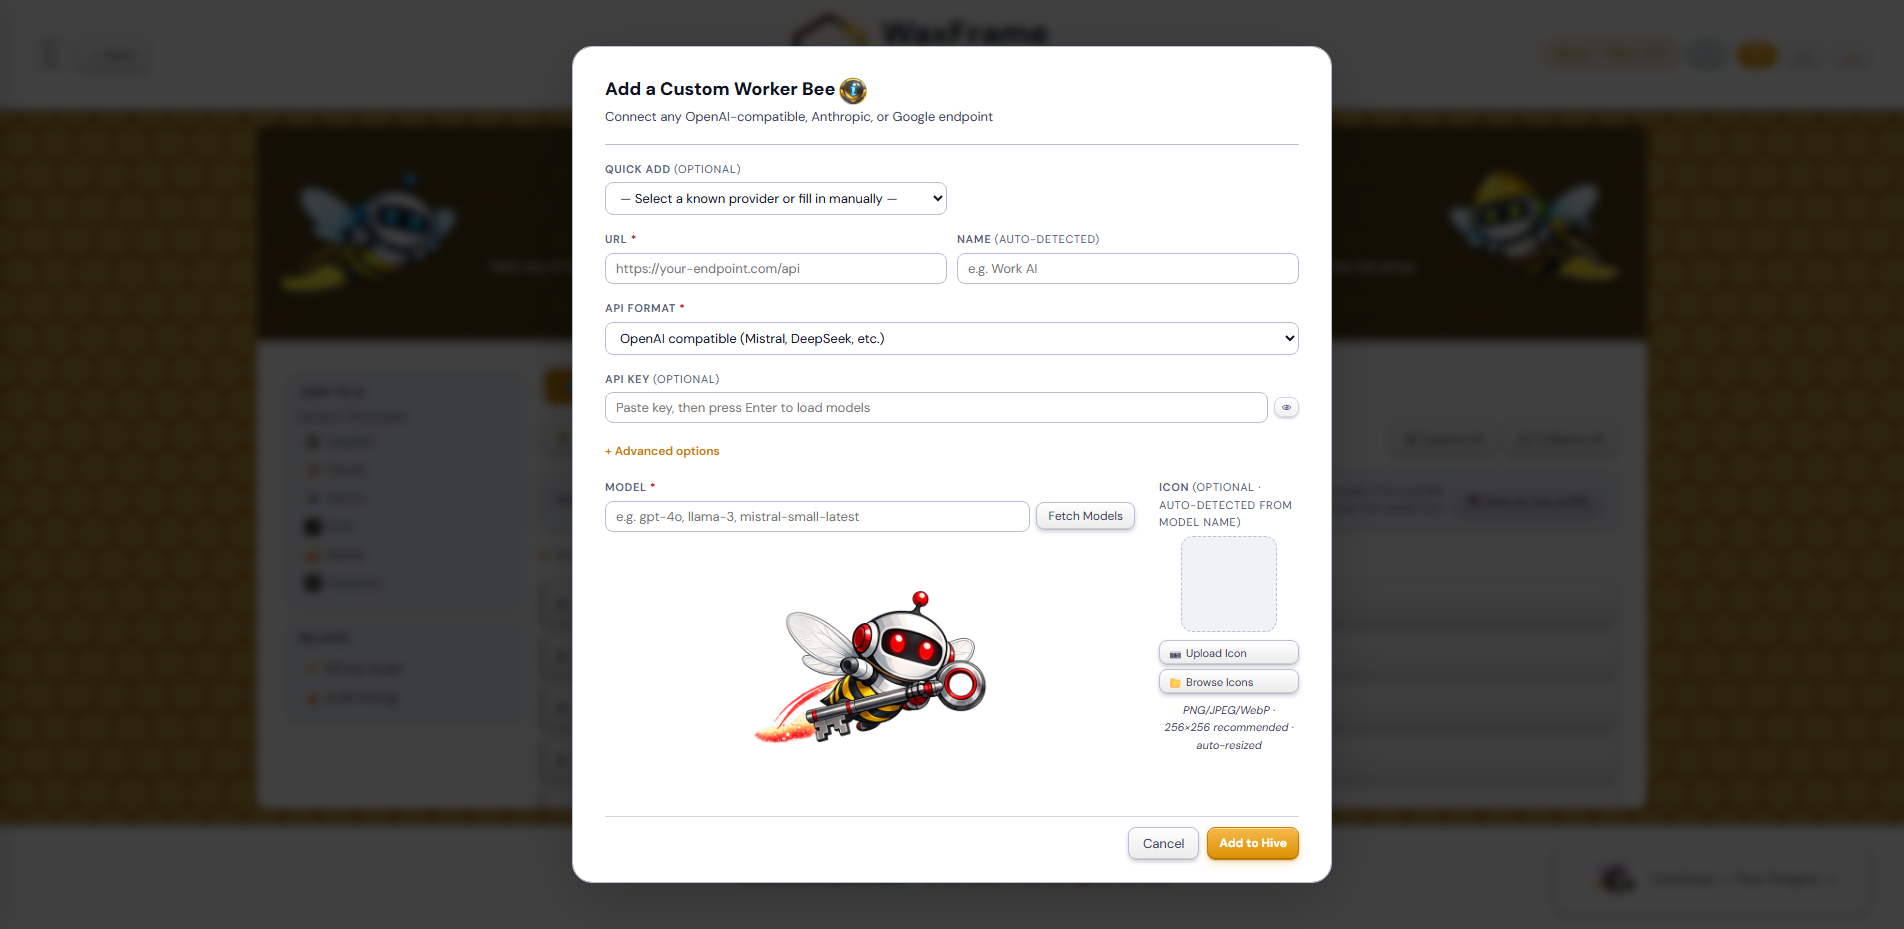
/v1/chat/completions. Example: https://api.together.xyz/v1/chat/completions. Get this URL from your provider's API documentation.
mistral-small-latest or llama-3.1-8b-instruct. This must be exact — even a single typo causes every API call to fail with a model-not-found error. Use the Fetch Models button (see below) instead of typing this manually whenever possible.
After entering your URL and API key, click Fetch Models. WaxFrame sends a request to the provider's models endpoint and retrieves the list of available models. A dropdown appears below the Model field showing all available models — click the one you want to use. This is significantly more reliable than typing a model ID manually and eliminates the risk of typo errors.
Click Test Connection before adding the AI. WaxFrame sends a minimal test message to the endpoint and opens a result panel showing the exact endpoint used, the full JSON body sent, the HTTP status code and response time, and the complete raw JSON response received. A passing test shows a green success message. A failing test shows a red error with a plain-English explanation:
⚠️ The Add to Hive button only appears after a successful test result. If you change any field after a passing test, the result resets and you must test again before the Add to Hive button reappears. This prevents accidentally adding a misconfigured AI.
If you have a local or enterprise AI server running — such as Open WebUI, Ollama, or LM Studio — and it hosts multiple models, Import from Model Server lets you fetch the complete list of models from that server and add several AIs to your hive at once, instead of adding them one by one using the Add Custom AI form. To open the form: go to the Setup screen and click Import from Model Server in the toolbar.
Setting up your local AI stack from scratch? The Local AI Server Guide walks through installing Ollama, Docker, and Open WebUI on Windows step by step, and includes hardware requirements, VRAM budgeting, model selection advice, and warm-start commands. It also covers LM Studio as an alternative server.
https://your-server.com/api/chat/completions. For Ollama it is http://localhost:11434/v1/chat/completions.
https://your-server.com/api/models. For Ollama it is http://localhost:11434/api/tags. This endpoint is queried when you click Fetch Models.
The Import from Model Server form is a single-screen workflow laid out in three columns: inputs on the left, context in the middle, and the model list on the right. At laptop viewport widths the middle and right columns merge into one region that shows the right content for the current state, so you always see what matters most.
WaxFrame remembers the last server you successfully added models from. The next time you open Import from Model Server, the three fields are pre-filled, a 🔑 saved indicator appears next to the API Key label, and WaxFrame automatically fetches the current model list for you — every open is a live query, never a cached list. Just tick any new models and click Add N to Hive. To switch to a different server, pick a new preset from Quick Add or type new URLs — the new values are saved on your next successful add. To clear the saved server, click Forget saved server below the Fetch Models button.
The 📋 View raw response button swaps the right region to show the endpoint, HTTP status, and full JSON the server returned — useful when a server returns models in an unusual format or when you want to verify exactly what WaxFrame received. Click ← Back to models on the same button to return to the checklist. The raw response is hidden by default since it is a diagnostic most users never need.
If a fetch fails, the right region switches to an error panel that explains what likely went wrong and suggests next steps. Common causes: an incorrect Models Endpoint path, an invalid or missing API Key, CORS restrictions on the server, or mixed-content blocking when WaxFrame is loaded from https:// but the server URL is http://localhost. For the mixed-content case, download WaxFrame and open it from a file:// URL instead, or serve it from a local web server on the same origin as your model server.
Ollama specifically will reject WaxFrame by default — even with a correct Chat/Models Endpoint and WaxFrame opened as a downloaded file:// page. Ollama has its own separate CORS allowlist, and a file:// page's requests carry an Origin: null header that Ollama refuses out of the box (you'll see "Network / CORS error" in the panel above, or a flat 403 if you check with a tool like curl). The fix is on Ollama's side, not WaxFrame's: before starting Ollama, set the environment variable OLLAMA_ORIGINS=*, then (re)start it. On Windows (PowerShell): [Environment]::SetEnvironmentVariable("OLLAMA_ORIGINS","*","User"), then restart Ollama. On Mac/Linux: export OLLAMA_ORIGINS=* before running ollama serve, or add it to your shell profile so it's always set. This tells Ollama to accept requests from any origin — reasonable for a personal machine, but be aware it means any website open in your browser could also reach your local Ollama while it's running. LM Studio and Open WebUI do not have this restriction by default and need no equivalent setting.
Many organisations run their own AI infrastructure — platforms like Open WebUI connected to internally hosted models, or enterprise subscriptions to OpenAI or Anthropic with private endpoints and access controls. WaxFrame connects to these through the Add Custom AI form (Appendix A) or Import from Model Server (Appendix B), provided the platform exposes an API endpoint that accepts chat completion requests.
| What you need | What to ask for |
|---|---|
| API endpoint URL | "What is the chat completions API endpoint URL for our AI platform, including the full path?" |
| Authentication method | "How do I authenticate API requests — is it a bearer token, an API key in a header, or something else?" |
| Model name | "What is the exact model ID string I should use in API calls?" |
| API format | "Is the API OpenAI-compatible?" (The answer is almost always yes for enterprise platforms.) |
| CORS policy | "Does the API allow requests from file:// origins, or does it need to be accessed from a web server?" |
If your organisation uses only internal AI models and you do not want the six default public AIs (ChatGPT, Claude, etc.) visible in your list, flip the 🖥 Server Based AI toggle at the top of Setup 1 — Set up your hive. This hides the six defaults and any direct-API customs from view (their saved keys are preserved — they reappear if you switch back to Internet mode) and shows only AIs imported from a model server. You can then click Import from Model Server in the toolbar to fetch the models available from your gateway (Open WebUI, Ollama, LM Studio, an internal endpoint provided by your organisation, or any other OpenAI-compatible server) and add several at once. See Appendix B — Using a Server-Based Hive for the full walkthrough.
Internal AI servers — Open WebUI, LM Studio, on-prem deployments serving multiple models — are common in defense, healthcare, financial, and other secure-network environments. They behave differently from the public-AI hives you'd run at home.
The substrate matters. A typical internal AI server hosts whatever models the deployment has been configured to serve. Those models can have knowledge cutoffs months apart, sometimes years apart. Two AIs in the same hive may have been trained against entirely different snapshots of reality.
What this means in practice:
The hive's output quality is bounded by the substrate it runs on. This is not a defect in WaxFrame — it's a property of the underlying models you're orchestrating.
When you need to run factually-anchored work on an internal AI server, three approaches help:
A 6-AI hive on a corporate internal AI server, refining a 16,214-character research report into a 300-word LinkedIn post, converged via the engine's majority path (4 of 6 AIs satisfied) in 5 rounds and 7 minutes.
| Setting | Value |
|---|---|
| Document type | LinkedIn Post |
| Target audience | Fellow Wi-Fi nerds and friends from various life stages |
| Tone | A specific voice description (one full sentence) |
| Length limit | 300 words |
| Starting document | 16,214 characters (a research report on the topic) |
| Hive | 6 AIs across three vendor families |
| Builder | One of the reviewers, doubling as Builder |
| Result | Engine-triggered majority convergence (4 of 6) at Round 5, 7 minutes total |
The run shows that internal AI servers can converge cleanly on heavy compression tasks (an 80× length reduction in this case) when the goal fields are filled specifically. This single run does not prove that goal-field specificity caused the convergence — only that the run had these properties and converged via the engine's normal majority path. As more runs are measured systematically, this guide will be updated with broader patterns.
WaxFrame opens as a local HTML file in your browser. Some internal AI servers block requests from file:// origins as a CORS policy — this is a security measure that prevents arbitrary web pages from connecting to internal servers. If you see a Network Error or CORS error when testing a connection, you have two options:
file:// to the allowed origins on the AI server's CORS configuration.python -m http.server 8080, then opening http://localhost:8080 in your browser instead of the file directly. Requests from localhost are typically allowed by internal servers.Both Setup 3 — Reference Material and Setup 4 (Starting Document) use the same importer, so everything described here applies equally to both surfaces. The importer aims for full-fidelity content capture — not just raw text. Because AIs only consume plain text, anything visual or structural must be flattened in some way or it is lost. This section is the canonical reference for exactly what makes the cut and what does not, format by format.
| Format | Extensions | What it is good for |
|---|---|---|
| Word | .docx | Most documents that originated in Word — proposals, reports, letters, templates, résumés. |
| Anything you cannot get back to its original source — published reports, downloaded specs, scanned documents. | ||
| PowerPoint | .pptx | Slide decks, especially when the substance lives in speaker notes rather than on-slide bullets. |
| Excel | .xlsx, .xlsm | Tabular data — pricing sheets, requirement matrices, scoring rubrics, comparison tables. |
| Plain text | .txt | Already-clean text from any source. |
| Markdown | .md | Already-clean structured text. Markdown formatting is preserved as-is. |
Preserved: Heading hierarchy rendered as markdown headings, bullet and numbered lists, tables, bold and italic emphasis, comments rendered as a Comments section with author and text, footnotes and endnotes (numbered), headers and footers (deduplicated so boilerplate appears once), text boxes (Word's native text-box content that other importers silently drop), and tracked-change accepted text — insertions are kept, deletions are dropped.
Not preserved: Embedded images, charts, exact fonts and styling, page break locations, drop caps, watermarks. The text and structure survive; the visual layout does not.
Native text PDFs: Position-aware text extraction with detected tables converted to markdown, plus the document outline (TOC) when present, AcroForm form-field values when filled, and annotation comments and highlights inlined as [Note on page N: contents] markers at the page where they appear. Table detection is heuristic — works well for clean grid-aligned tables, may miss heavily-styled tables or those with merged-cell headers.
Scanned or image-only PDFs: Routed automatically to AI vision transcription using the first vision-capable AI in your hive (ChatGPT, Claude, Gemini, or Grok). When the transcription returns, the Verify & edit modal opens automatically so you can check the extracted text against the original PDF on the left, fix anything that doesn't match, re-scan with a different AI if too many things are wrong, back up a clean copy, and commit it to the project with Proceed. If no vision-capable AI key is configured, the importer returns whatever text it could extract along with a warning.
Mixed PDFs (mostly text with sparse pages): Pages with very little extractable text in an otherwise text-rich document trigger a heuristic OCR pass. The sparse pages are rendered to images and OCR'd via your vision-capable AI. The OCR output is appended as a separate section so the original text is preserved alongside it. This catches the common "screenshot of a table embedded in an otherwise text PDF" case that previously dropped silently.
Re-extract on demand: If the initial extraction for a PDF looks garbled or wrong, the work screen shows a banner offering to re-extract using AI vision. This re-runs the full-document vision transcription regardless of the original detection.
Preserved: Slide order, slide titles separated from body content (each slide becomes ## Slide N: Title), bullet content on each slide, speaker notes (rendered as **Speaker notes:** directly under each slide), embedded tables converted to markdown, SmartArt diagram text, and chart titles, category labels, and series names.
Not preserved: Slide layouts and themes, animations and transitions, embedded images, chart visualizations themselves (only the labels survive), per-element positioning. Decks that rely heavily on visual composition rather than text content will lose most of their meaning — paste the key takeaways manually if that is what matters.
Note on speaker notes: The importer maps notes to slides by filename (notesSlide1.xml ↔ slide1.xml). For typical decks this works correctly. For decks rebuilt from templates with non-default note ordering, notes may appear under the wrong slide — rare but worth knowing about.
Workbooks with two or more visible sheets show a sheet picker modal on import. Pick which sheets to ingest. The picker shows the cell count and an estimated token count for each sheet so you can make informed selections. Single-sheet workbooks ingest directly with no modal.
Setup 3 — Reference Material: Each selected sheet becomes its own independent reference card with its own name, token chip, and reorder controls. Leverages the multi-document support added in v3.24.0.
Setup 4 (Starting Document): Selected sheets are concatenated into a single document with ## Sheet: H2 dividers between them. If you only want one sheet, uncheck the others in the picker.
Per-sheet conversion: Cell values are extracted with formulas evaluated to their displayed values — a cell showing $1,250.00 from a SUM formula appears as $1,250.00 in the output, not the raw number or the formula text. Merged cells are flattened by repeating the top-left value across the merged span. Cell comments are captured in a per-sheet **Cell notes:** footer. Workbook-level defined names are surfaced as a glossary header. Sheets with more than 15 columns prepend a warning that markdown table comprehension by AIs may degrade past that width — there is no hard cap.
Not preserved: Cell colors and conditional formatting, chart visualizations and embedded images, pivot table source data (cached display values are shown for pivots), macros (not run), hidden sheets (skipped — count surfaced via warning).
Read directly into the working document or reference card with no transformation. Markdown formatting is preserved as-is — most reviewers handle markdown structure naturally and will respect heading hierarchy, lists, and emphasis when reasoning about the document.
Vision OCR runs automatically when the standard text extraction yields garbled or near-empty output (scanned PDFs, image-only PDFs, or PDFs with sparse-text pages where embedded screenshots dominate). It uses the first vision-capable AI from your hive in this priority order: ChatGPT, Claude, Gemini, Grok. If none of those four providers have a key configured, the importer skips the OCR step and returns whatever text it could extract along with a warning suggesting which keys to add.
OCR runs add latency — typically 15–30 seconds for a short document, longer for many pages. They also add cost (a vision API call per page or batch of pages). The importer is conservative about firing OCR — it only does so when the standard extraction quality is genuinely poor.
The importer is best-effort. For documents where exact wording matters — a legal contract, a regulatory specification, a customer email you must respond to verbatim — paste the text manually rather than relying on extraction. Two clicks of copy/paste from the source application will always be more accurate than any importer because there is no extraction step at all.
For documents where structure and bulk content matter more than exact wording — research papers, long reports, drafts you want feedback on, RFP requirements you want the hive to cite against — the importer is more than good enough. Spot-check the result if you have any doubt about a critical passage.
All four ingestion libraries (PDF.js, Mammoth, JSZip, SheetJS) ship inside the WaxFrame source tree at /lib/. There is no CDN reach-back at runtime — the page works end-to-end on networks that block external fetches. This is the recommended configuration for defense, healthcare, financial, and other secure environments. Total library footprint is approximately 3.1 MB added to first-load.
| Situation | What to do |
|---|---|
| Tone is wrong throughout | Open Notes before the next round and write explicitly: "The tone throughout the entire document must be [formal / conversational / technical / plain-English]. Rewrite any passages that do not match this." Be specific about what you want. |
| AIs keep adding content you do not want | Edit your project goal to explicitly exclude it. Add a Note reinforcing the exclusion. If one specific AI keeps doing it, use Edit Hive (laptop) or toggle the AI card directly (desktop) to remove that AI for a round or two. |
| The document has drifted badly from where you want it | Open the Menu and click ⏱ Round History to restore an earlier version. Add a Note explaining the direction the next round should take. If your goal was too vague, edit it on the Project screen before running another round — click the project name in the top bar to open the goal viewer without leaving the Work screen. |
| It would be faster to start over | Click 🏁 Finish → Start New Project. This clears the document and history but keeps your API keys. Return to the Project screen, rewrite your goal with tighter scope, and begin again. |
This means the Builder returned output that WaxFrame could not parse, or the response never arrived intact. The troubleshooting card names which case applies — and it distinguishes what the provider actually reported from what WaxFrame merely inferred, so you are never told a limit was hit on evidence that does not show one:
%%…_START%% blocks and never closed it, but the provider did not report running out of room. WaxFrame deliberately does not call this a token limit, because the evidence does not show one. Three things cause it: the model did not follow the required output format (most common — retry, or switch Builder), the response was cut short in transit (a proxy or gateway closing the connection mid-stream looks exactly like this), or an output limit the endpoint applied without telling us. On a corporate or self-hosted gateway, check the connection explanation before the token one.In every case your document was not changed by the failed round, and the failed attempt is recorded in your Round History for reference.
Open the Notes drawer before the next round and quote the exact text you resolved. Do not paraphrase — use the 🔒 Lock a line template button and paste the exact passage from your document into the placeholder. Write clearly that this decision is final and must not be re-raised. If the problem persists after two rounds, add the same instruction to Additional instructions on the Project screen so it is sent every round permanently. If it still continues after that, toggle the offending AI off via Edit Hive (laptop) or directly on its card (desktop).
Click the Test button next to that AI on the Setup screen. The result panel shows the exact error. Common causes: the key was copied incorrectly (extra space at the start or end is a frequent culprit), the key has been revoked or expired at the provider's end, the account has run out of credit, or the account is on a free plan that does not include API access. To visit that provider's API console directly, expand that AI's row by clicking it, then click the Open [provider] account link inside the expanded panel — and verify your key and account status.
WaxFrame requires at least two AIs with saved, working keys and a Builder selected before the Smoke the Hive button activates. If it is greyed out or inactive, open the Menu and navigate to Setup 1 — Set up your hive. Verify that at least two AI key fields show the 🔑 icon and that one row's 🔨 Builder button is gold (the active Builder). Note: two AIs is the technical minimum, but three or more is the empirical recommendation for faster convergence and automatic resolution of reviewer disagreements — see Step 5 above.
AI provider websites change their navigation regularly. If a link in WaxFrame leads to a dead or moved page, open the API Key Guide from the Menu — it is updated with each WaxFrame release and contains current direct links for every supported provider.
↑ Back to topWaxFrame does not charge per use. The cost of running rounds comes from the API calls WaxFrame makes to your AI providers on your behalf — and those are billed directly to your account at each provider. WaxFrame requires only a one-time license fee after the first three free rounds.
API costs are measured in tokens — small units of text (roughly 0.75 words per token). You are charged for both the tokens sent in the prompt and the tokens returned in the response. For a detailed explanation of how tokens work and how to estimate your costs, see What Are Tokens?
DeepSeek consistently produces high-quality output at a fraction of the cost of OpenAI, Anthropic, or Google. It is an excellent choice as both a reviewer and Builder when managing costs matters.
Click Get API keys on the Setup screen to open the in-app drawer listing each AI's console URL — most providers' API consoles also have a billing or usage tab. Check your usage after your first few sessions to understand your actual per-round cost. Provider pricing changes periodically — bookmark your billing dashboards and check them at least monthly.
Most providers let you choose between prepay — load credit up front and spend it down — and pay-as-you-go, billed after the fact. Choose prepay, and switch off any auto-reload or auto-top-up option that comes with it.
Two reasons. A hive run is a loop: several AIs, several rounds, with retries when a call fails. A run that misbehaves on pay-as-you-go keeps billing until you notice. And an API key is a password that is unusually easy to leak — pasted into the wrong window, committed to a repository, caught in a screenshot. A prepaid balance with auto-reload off means the worst case is losing whatever is currently loaded. Prepay with auto-reload on is pay-as-you-go wearing a hat: it recharges itself from your card indefinitely, which is the thing you were trying to prevent.
The trade-off is that calls stop when the balance runs out. For WaxFrame that is a good trade — you are at the keyboard while a hive runs, checkpoints preserve your session, and topping up takes a minute. Load $5 to $20 and check it every month or so.
For Gemini this is the "Choose how you pay" dialog in Google AI Studio: pick Prepay, not Postpay. Note the warning in that dialog — the choice applies to every project linked to that billing account, not only the one you are editing.
Perplexity requires you to explicitly enable auto-billing in your account settings before API calls will succeed. If Perplexity's Test button returns a billing-related error, log into your Perplexity account at console.perplexity.ai(opens in a new tab), enable auto-billing, and retry the test.
For a side-by-side comparison of every model's per-token cost, see the AI API Pricing(opens in a new tab) page.
| AI | Default model | Pricing page | Billing page |
|---|---|---|---|
| ChatGPT | gpt-5.6-sol | developers.openai.com(opens in a new tab) | platform.openai.com(opens in a new tab) |
| Claude | claude-sonnet-4-6 | platform.claude.com/pricing(opens in a new tab) | platform.claude.com(opens in a new tab) |
| Gemini | gemini-3.5-flash | ai.google.dev/pricing(opens in a new tab) | aistudio.google.com(opens in a new tab) |
| Grok | grok-4.7 | docs.x.ai/pricing(opens in a new tab) | console.x.ai(opens in a new tab) |
| Perplexity | sonar-pro | docs.perplexity.ai/pricing(opens in a new tab) | console.perplexity.ai(opens in a new tab) |
| Mistral | mistral-large-latest | mistral.ai/pricing(opens in a new tab) | admin.mistral.ai(opens in a new tab) |
| DeepSeek | deepseek-flash | api-docs.deepseek.com/pricing(opens in a new tab) | platform.deepseek.com(opens in a new tab) |
| Together AI | Llama-3.3-70B | together.ai/models(opens in a new tab) | api.together.ai(opens in a new tab) |
| Cohere | command-r-plus | docs.cohere.com/models(opens in a new tab) | dashboard.cohere.com(opens in a new tab) |
To change the model for any AI, go to the Setup screen and click the model name shown below that AI's key field. A dropdown appears with all models currently available on your account with that provider, fetched live at the time you open it.
↑ Back to topWaxFrame has a dedicated Help page at help.html. You can reach it any time from inside the app — open the ☰ menu in the top-left and pick 🛟 Help from the Help & Support section — or visit waxframe.com/help.html directly in a browser.
The page is built for two situations: you want to file a bug or feature request, or you want to give someone (me) enough information to reproduce what you saw without sending personal data.
The Help page has a single button that exports a JSON snapshot of your session — your active hive configuration, your project setup, your current document round, browser environment, and recent error history. Before the file is written to your downloads folder, three things are stripped automatically: every API key, your license key, and (optionally, with a checkbox) your document text and AI responses. Document and reference text are kept by default because they are usually what support needs to reproduce a content-related bug; uncheck the box if your document is sensitive.
The bundle is for sharing with support only — it has no reason to round-trip and cannot be restored. For a restorable share-safe file, save a checkpoint with API keys and license unticked (see Step 7 — Save Your First Checkpoint). For a private restorable copy of your full session, save a checkpoint with everything ticked — it keeps your keys and is restorable, but should only be stored somewhere you trust.
The Help page also has a one-click link that opens a pre-filled GitHub issue with your WaxFrame version, build number, browser, and operating system already in the body. You add what happened and how to reproduce it, drag the diagnostic bundle in if you grabbed one, and submit. Issues filed through this flow get auto-labeled auto-reported so they show up immediately in the project's triage queue.
If you would rather file an issue directly, go to github.com/WeirDave/WaxFrame-Professional/issues/new(opens in a new tab) — it uses the same template, just without the auto-filled environment block.
If an AI returns an error message saying you are out of credit or your API key is invalid, that is a billing or authentication issue with that AI provider — not a WaxFrame bug. Open the provider's console (Test All Keys in WaxFrame surfaces a direct link to the right billing page) and resolve it there. WaxFrame surfaces the provider's own error verbatim so you know exactly what to fix.
If a round produces a result you do not like, that is also not a bug — that is the hive doing its job and giving you something to react to. Edit your goal fields, resolve any conflicts, and run another round.
About
Built with ❤️ by WeirDave and Claude.
Enter your license key to continue.
Don't have a key? Buy WaxFrame Pro(opens in a new tab)
Your WaxFrame Pro license is active.